Ever wondered how to ensure all your data remains neatly visible without compromising your spreadsheet’s layout? Wrapping text in Google Sheets is the answer.
Whether you’re dealing with lengthy descriptions or addresses, mastering text-wrapping techniques is essential for maintaining clarity and professionalism in your spreadsheets. In this guide, we’ll delve into everything you need to know about wrapping text in Google Sheets, from basic techniques to advanced strategies and troubleshooting common issues.
Overview of Text Wrapping in Google Sheets
Text wrapping is a crucial feature in Google Sheets that allows you to display long strings of text within a single cell without distorting the layout of your spreadsheet.
What is Text Wrapping?
Text wrapping refers to the process of adjusting the display of text within a cell so that it fits within the specified column width without overflowing into adjacent cells. When text wrapping is applied, long strings of text are automatically wrapped within the cell, ensuring that all content remains visible.
How Does Text Wrapping Work?
When you enable text wrapping for a cell or range of cells in Google Sheets, the text within those cells is automatically adjusted to fit the column width. If the text exceeds the width of the cell, it wraps to the next line within the same cell, maintaining the integrity of the layout.
Key Features of Text Wrapping
- Automatic Adjustment: Text wrapping automatically adjusts the display of text within cells based on the specified column width.
- Preservation of Layout: Text wrapping ensures that the layout of your spreadsheet remains intact, even when dealing with long strings of text.
- Enhanced Readability: By wrapping text within cells, you improve the readability of your spreadsheet, making it easier for users to interpret the data.
Importance of Text Wrapping for Data Presentation
Effective data presentation is essential for conveying information clearly and comprehensively. Text wrapping plays a crucial role in enhancing data presentation in Google Sheets. Let’s explore why text wrapping is important for presenting data effectively.
- Ensures Visibility of Data: Text wrapping prevents long strings of text from being truncated or hidden from view, ensuring that all data within a cell is fully visible to users. This is particularly important when dealing with descriptions, addresses, or other textual data that may exceed the width of a cell.
- Maintains Readability and Clarity: By wrapping text within cells, you maintain the readability and clarity of your spreadsheet. Users can easily view and interpret the data without being overwhelmed by lengthy text that spills over into neighboring cells.
- Facilitates Comparison and Analysis: Text wrapping allows you to present data in a concise and organized manner, making it easier for users to compare and analyze information. By keeping related data within the same cell, you enhance the user experience and facilitate decision-making processes.
- Enhances Professionalism: A well-formatted spreadsheet with properly wrapped text conveys professionalism and attention to detail. Text wrapping ensures that your data presentation is polished and professional, reflecting positively on your work and your organization.
Text wrapping is a vital feature in Google Sheets that ensures the visibility, readability, and professionalism of your data presentation. By understanding its importance and utilizing it effectively, you can create spreadsheets that effectively communicate information and support informed decision-making.
How to Wrap Text in Google Sheets?
Let’s start by exploring the fundamental techniques for text wrapping in Google Sheets, including both manual and automatic methods. Whether you prefer hands-on control or automated adjustments, these techniques will help you effectively manage text wrapping in your spreadsheets.
How to Wrap Text in Google Sheets Using the Format Menu
Manual text wrapping provides you with precise control over how text is displayed within cells.
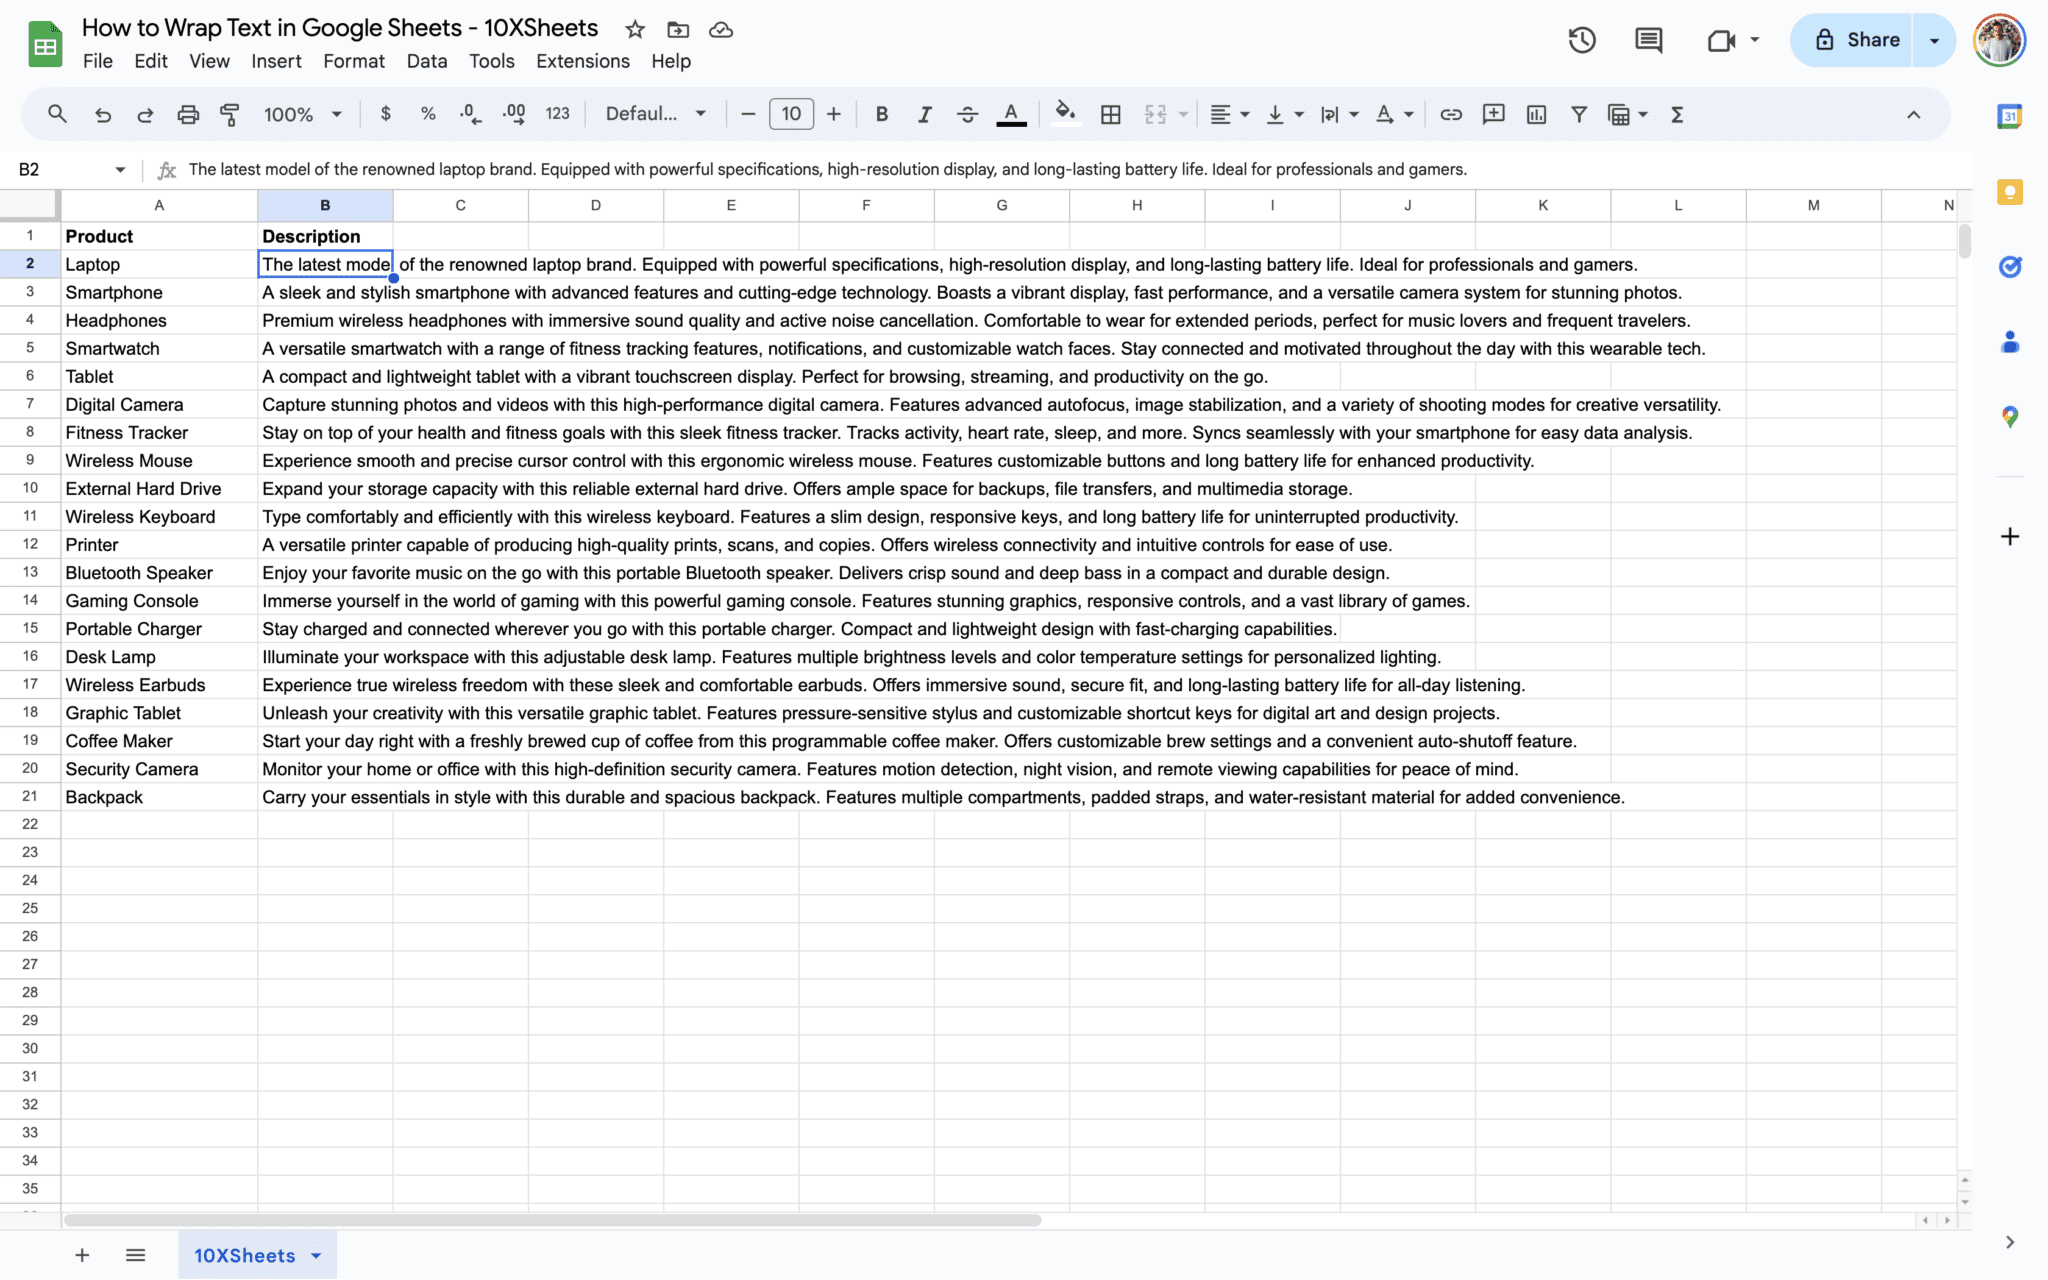
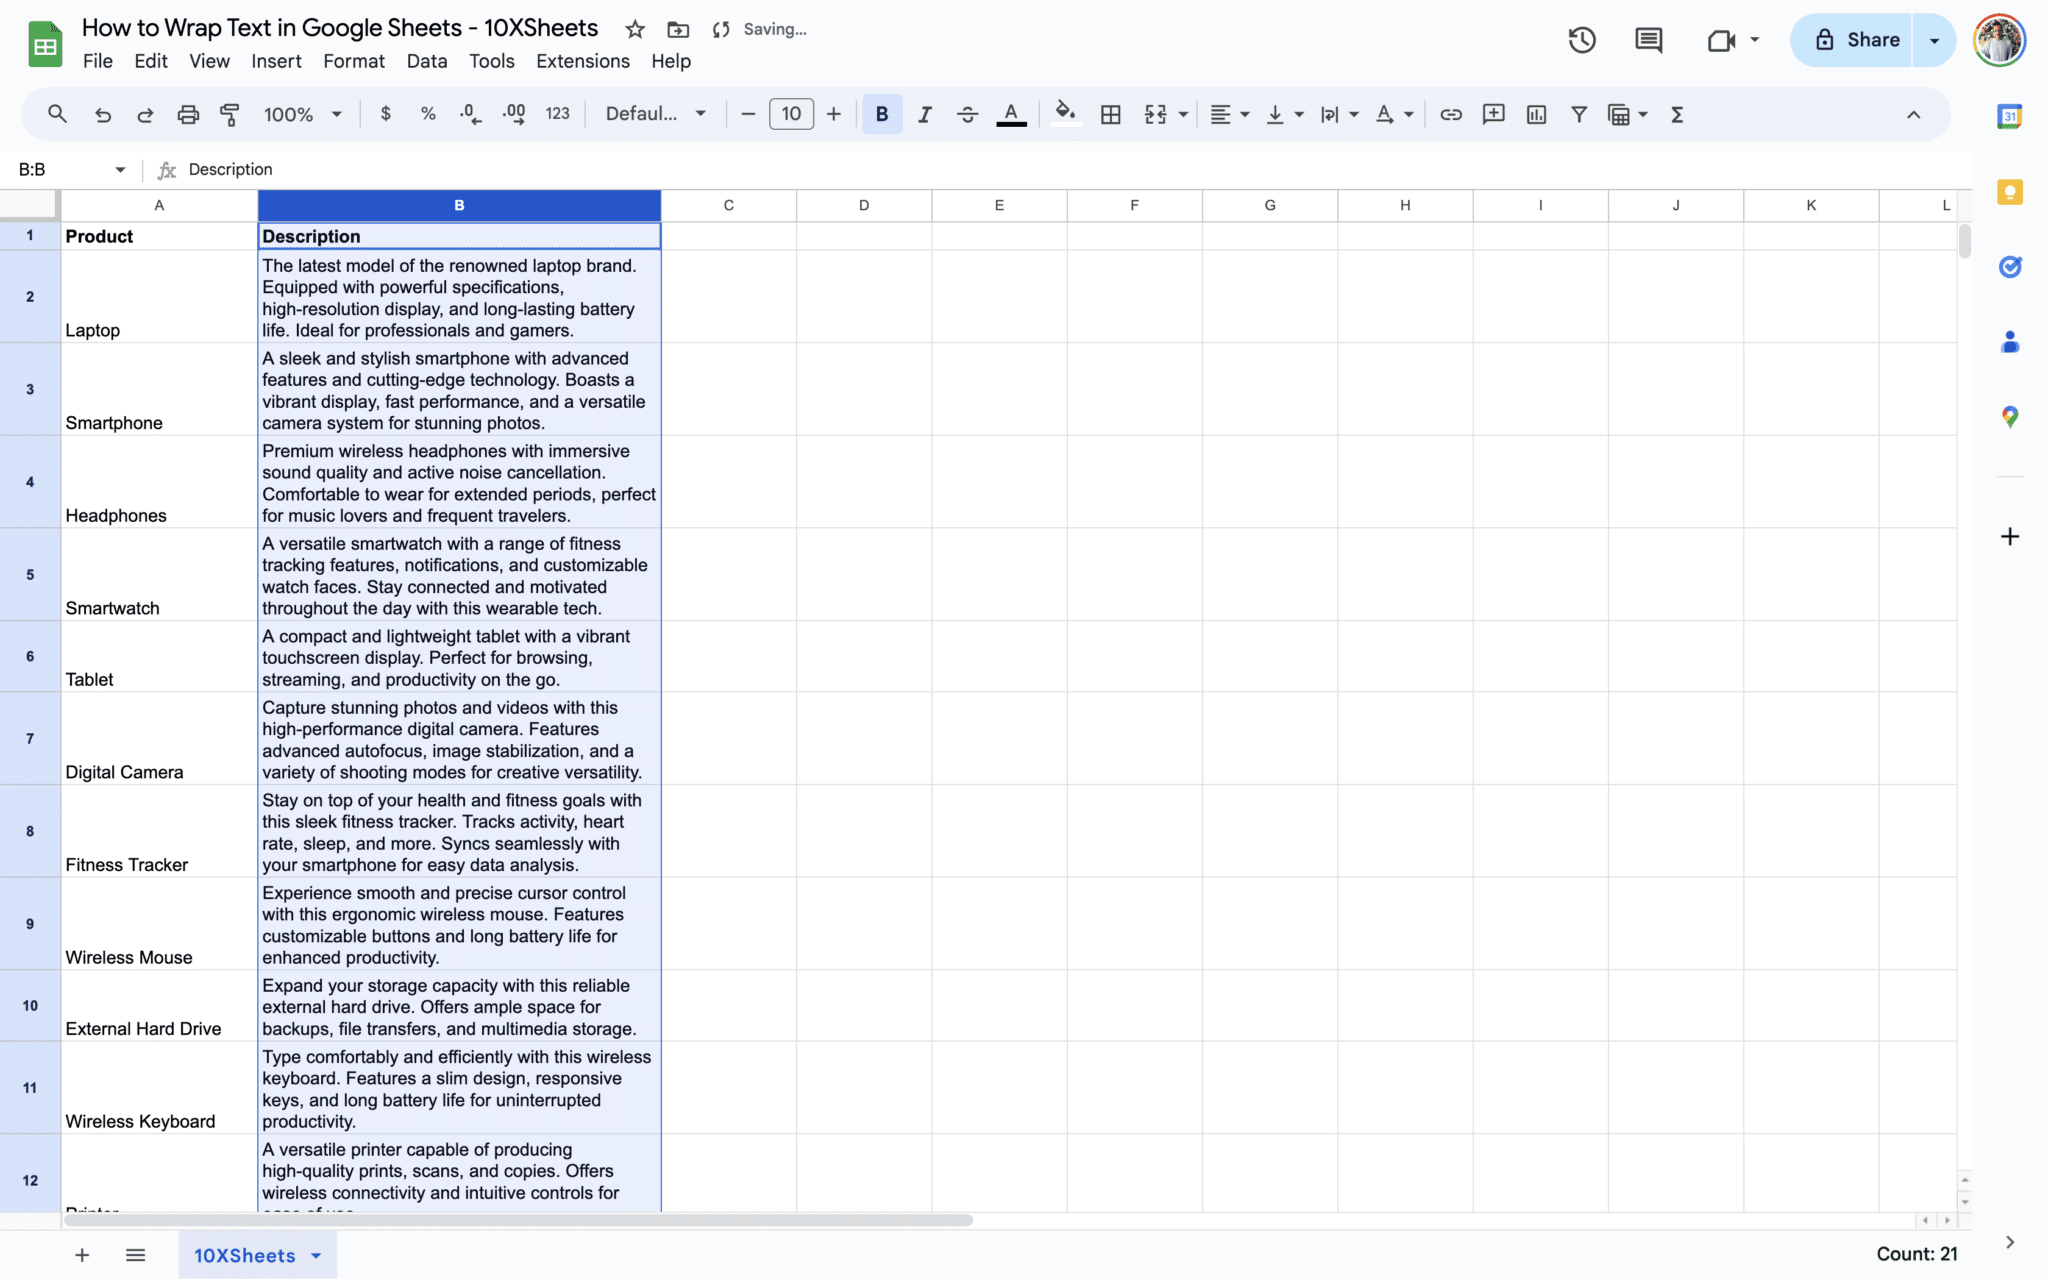
How to Wrap Text in a Cell in Google Sheets
To manually wrap text in a cell, follow these simple steps:
- Select the Cell: Click on the cell containing the text you want to wrap.

- Format Menu: Navigate to the “Format” menu located at the top of the Google Sheets interface.
- Text Wrapping: Click on “Text wrapping” within the “Format” menu.
- Wrap Option: Select the “Wrap” option from the dropdown menu.
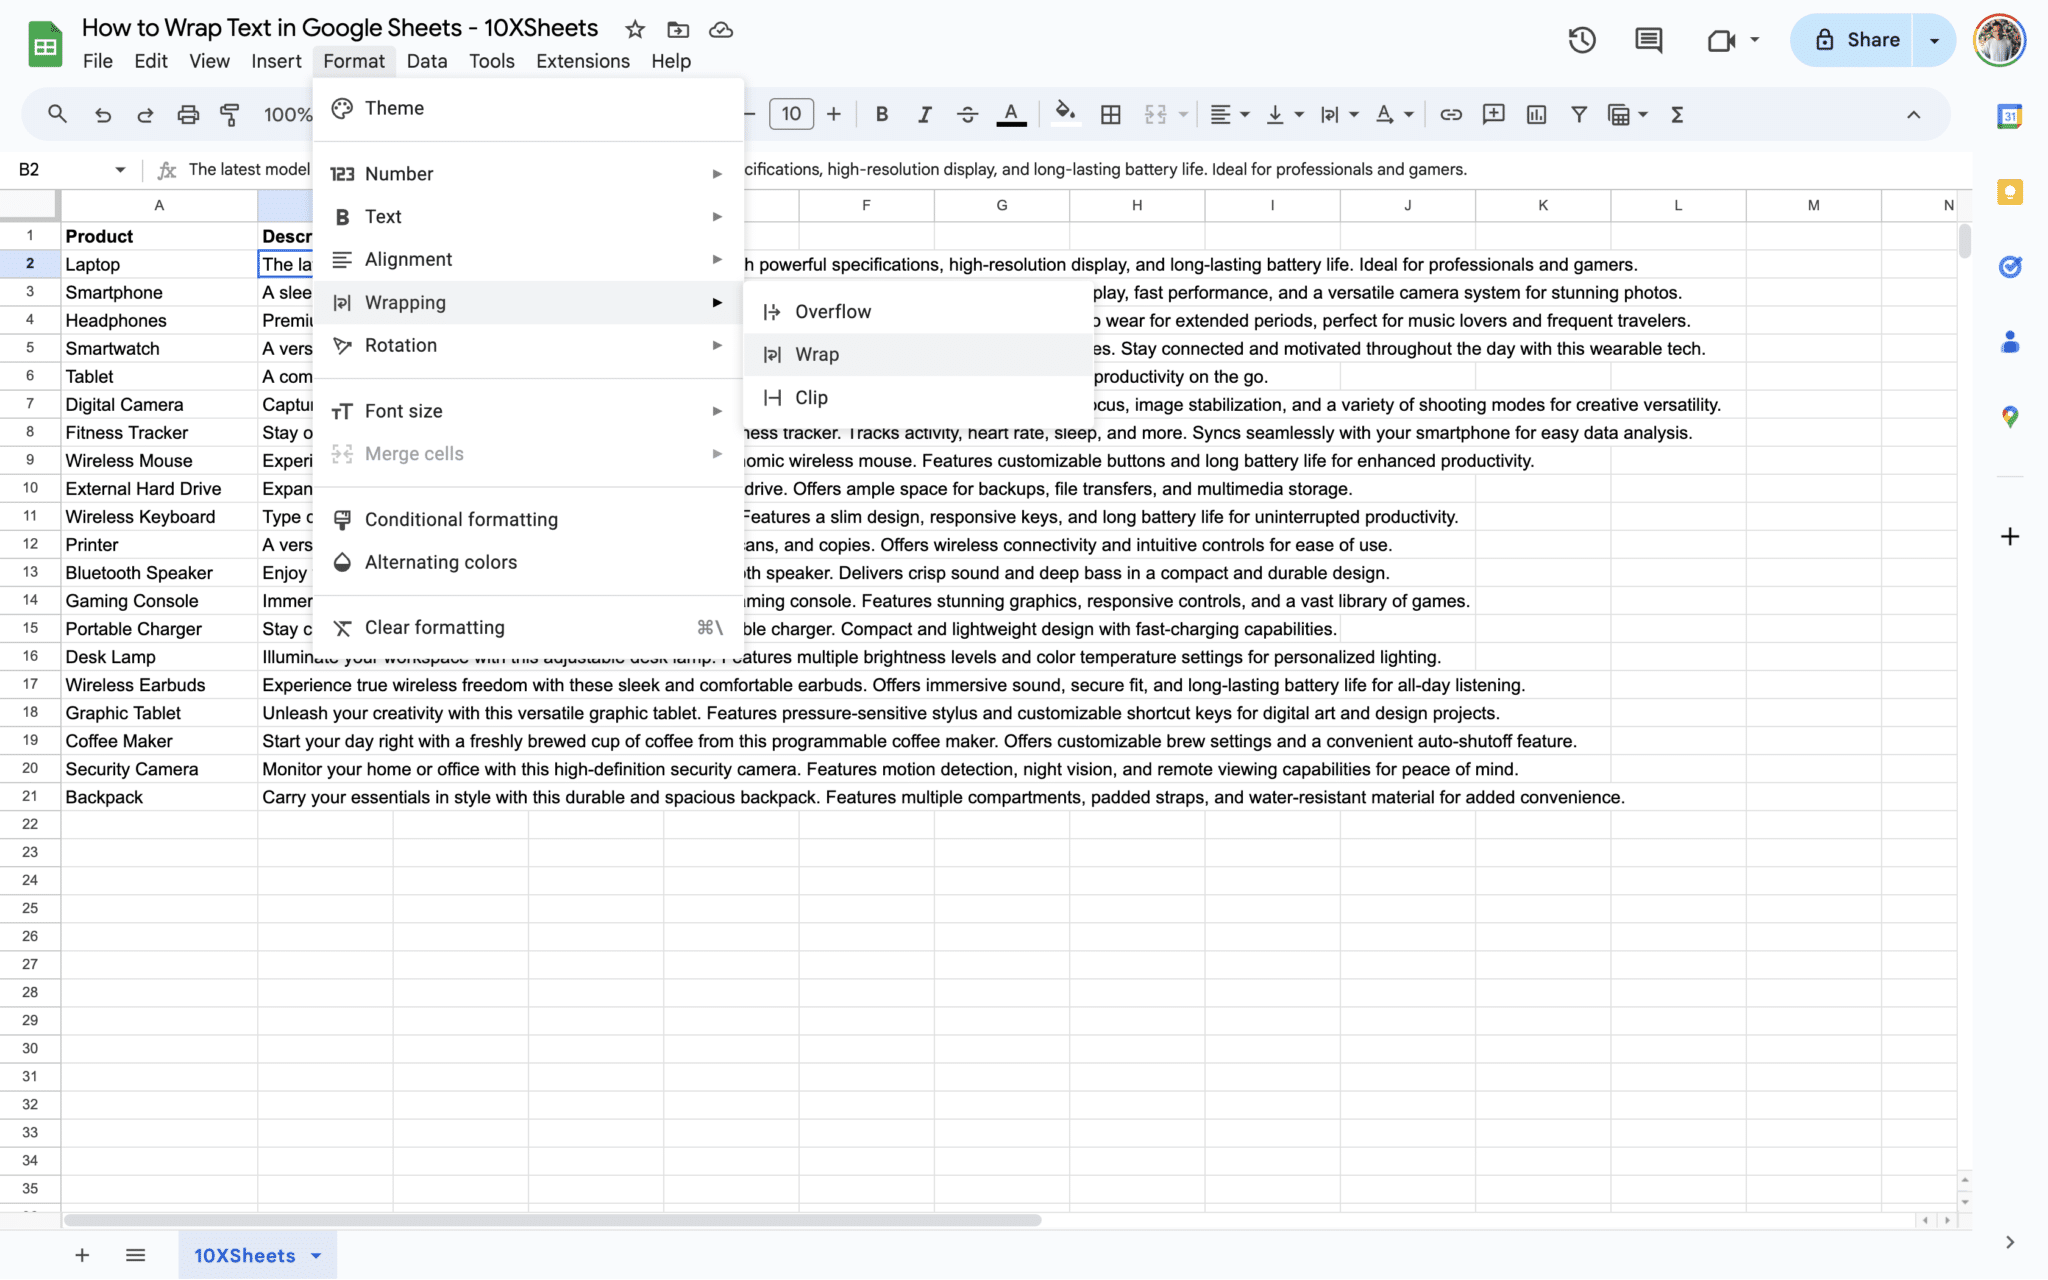
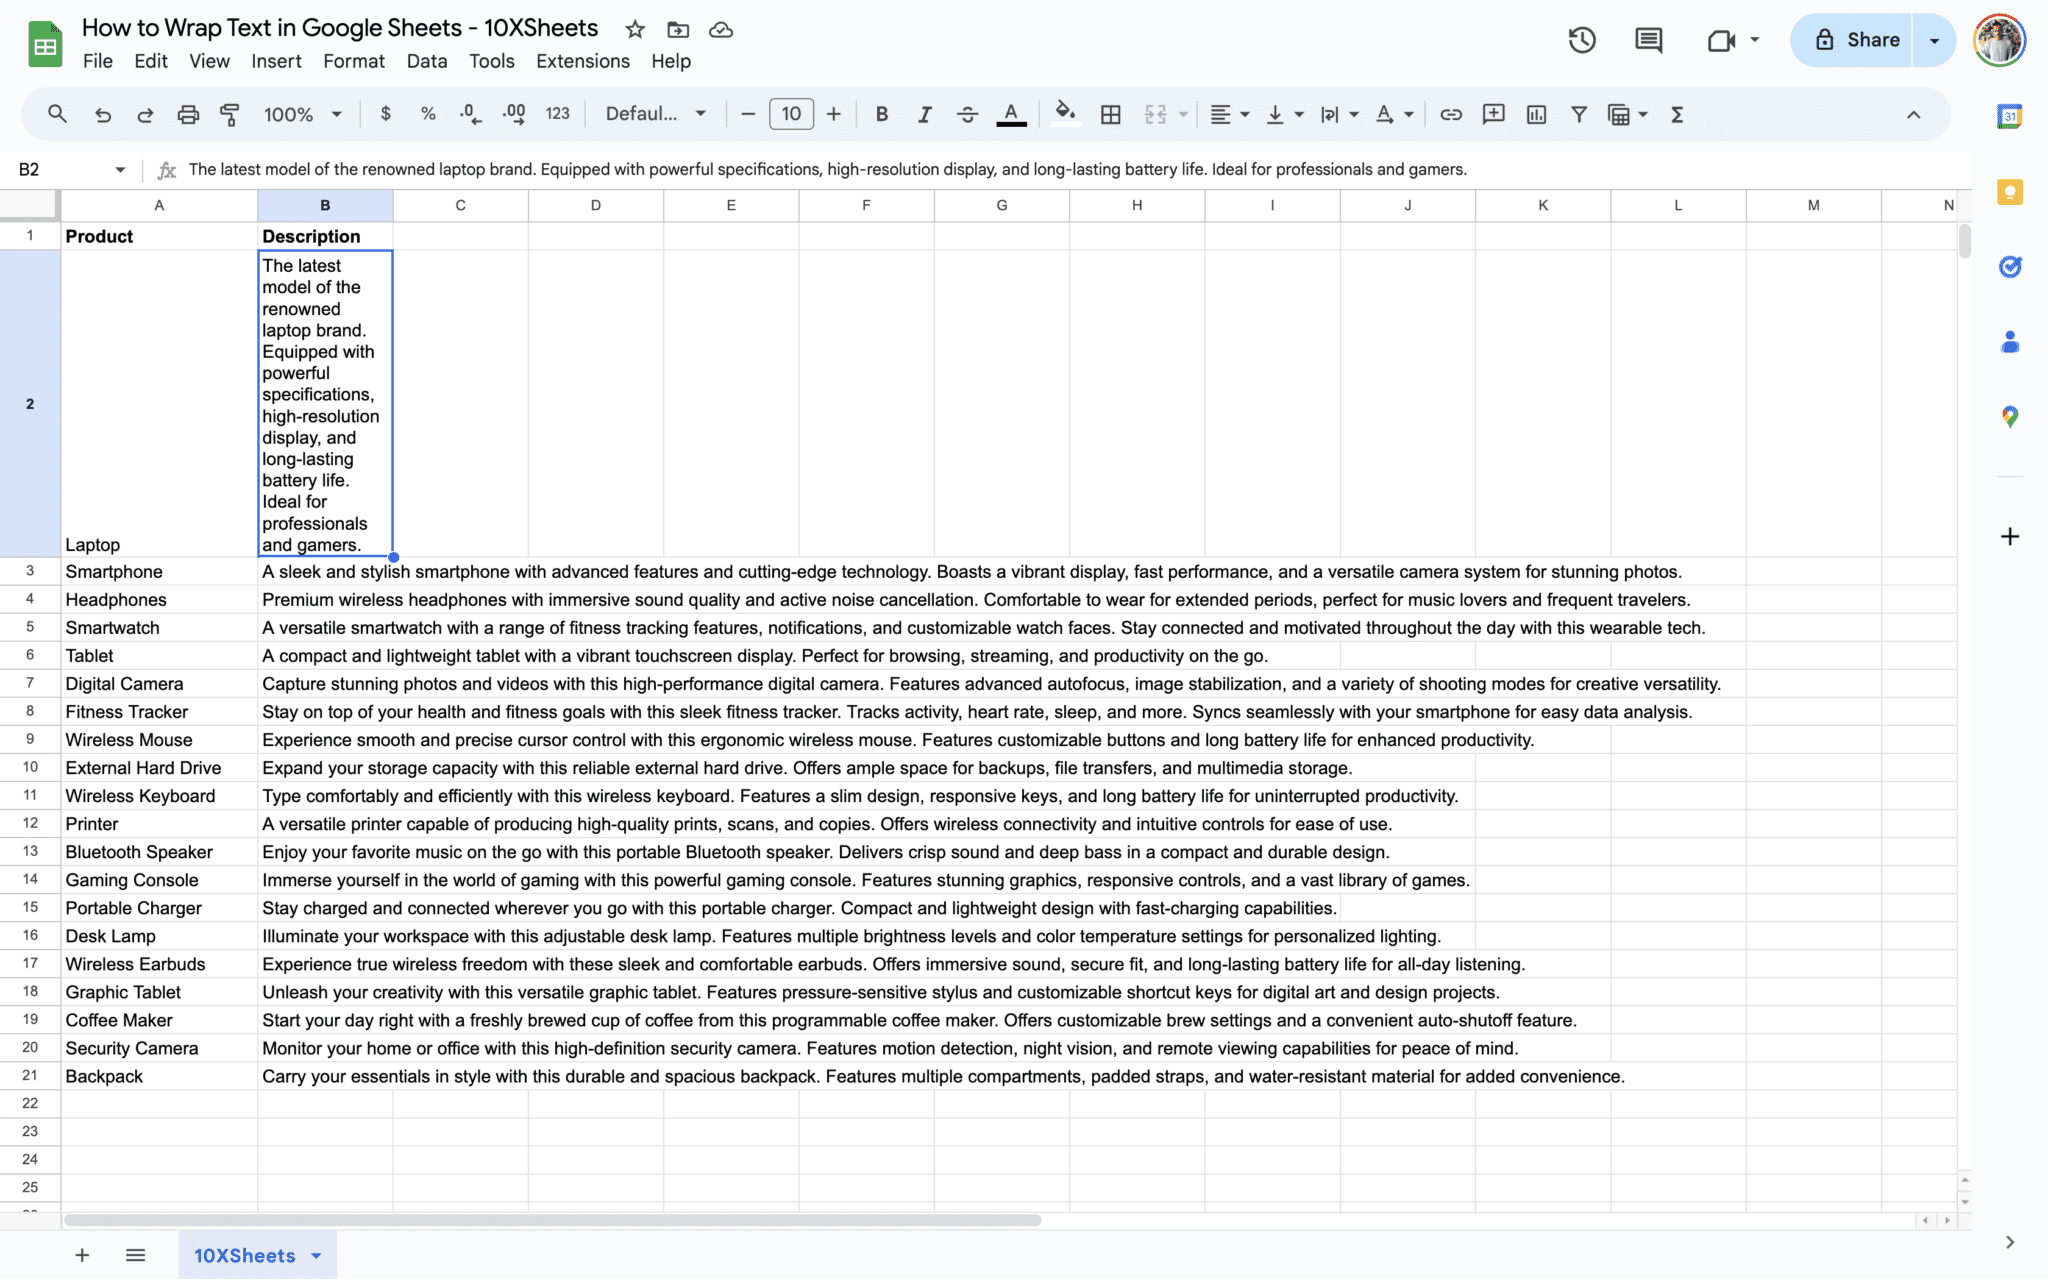
By following these steps, the text within the selected cell will be wrapped to fit the column width, ensuring that all content remains visible.
Adjusting Column Width for Wrapped Text
To ensure all wrapped text is fully visible, you may need to adjust the column width:
- Hover Over Column Header: Position your cursor between the column letters until it changes into a double-sided arrow.
- Adjust Column Width: Click and drag the column boundary to the desired width, accommodating the wrapped text.
By adjusting the column width, you optimize the presentation of your data, ensuring that all information is clearly visible within the cells.
Automatic Text Wrapping
Automatic text wrapping simplifies the process by allowing Google Sheets to automatically adjust the display of text within cells. Let’s explore how you can enable automatic text wrapping.
How to Wrap Text in a Range in Google Sheets
Enabling automatic text wrapping is straightforward:
- Select the Range: Highlight the range of cells where you want to enable automatic text wrapping.
- Format Menu: Navigate to the “Format” menu.
- Text Wrapping: Click on “Text wrapping” within the “Format” menu.
- Wrap Option: Choose the “Wrap” option from the dropdown menu.


Once enabled, Google Sheets will automatically adjust the display of text within the selected range of cells, wrapping it to fit the column width.
Using the Google Sheets Toolbar
You can also wrap text in Google Sheets using the toolbar. Here’s how:
- Select the Cell: Click on the cell containing the text you want to wrap.
- Google Sheets Toolbar: Look for the toolbar at the top of the screen.
- Text Wrapping Icon: Locate the text wrapping icon, typically represented by an icon with lines of text wrapping around.
- Click to Wrap: Click on the text wrapping icon and select “wrap” in the middle to enable wrapping for the selected cell.

Utilizing the Google Sheets toolbar provides a convenient alternative to accessing text wrapping options, allowing for quick and efficient text wrapping directly from the toolbar.
Advanced Google Sheets Text Wrapping Options
In Google Sheets, the text wrapping feature offers various options to handle situations where text exceeds the width of a cell. Overflow and clip are two of the most commonly used text wrapping options, each serving distinct purposes in managing text presentation. In this section, we’ll delve into the details of overflow and clip options, exploring their functionalities and how they affect the display of text within cells.
Clip: Truncating Text to Fit Cell Boundaries
Clip is a text-wrapping option in Google Sheets that truncates text to fit within the boundaries of a cell. When clip is applied to a cell, any text that exceeds the cell width will be clipped or cut off, and only the portion that fits within the cell will be displayed. This option is useful when you want to maintain a clean and compact layout, prioritizing space efficiency over displaying the full text content.
To Enable Clip:
- Select the Cell: Select the cell or range containing the text you want to apply clip to.
- Format Menu: Navigate to the “Format” menu at the top of the Google Sheets interface.
- Text Wrapping: Click on “Text wrapping” within the “Format” menu.
- Clip Option: Choose the “Clip” option from the dropdown menu.
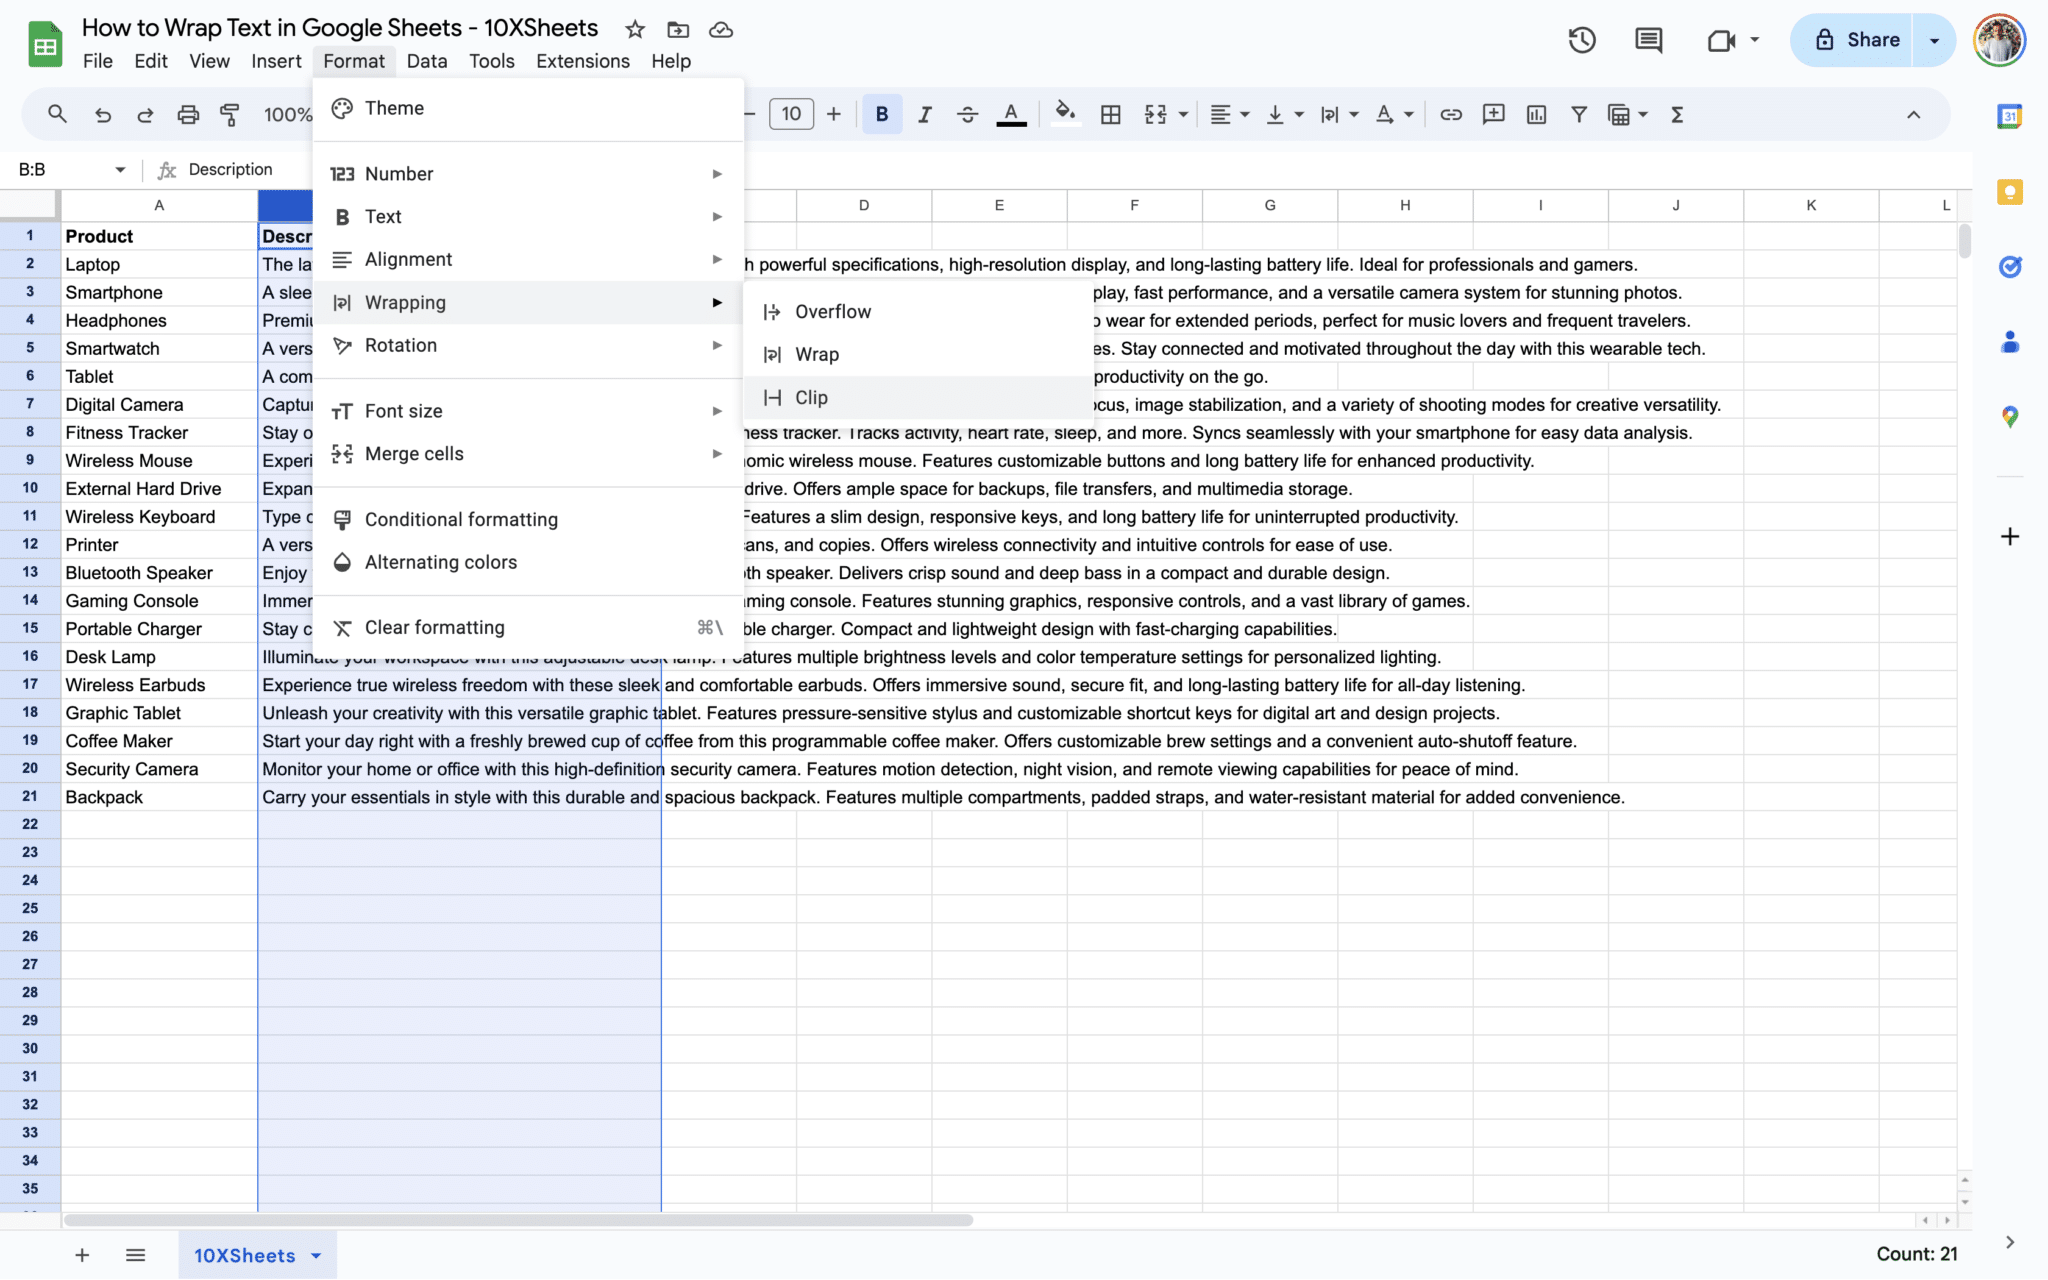
By applying clip, you ensure that text content within cells remains neatly contained, preventing it from extending beyond the cell boundaries and maintaining a tidy appearance in your spreadsheet.
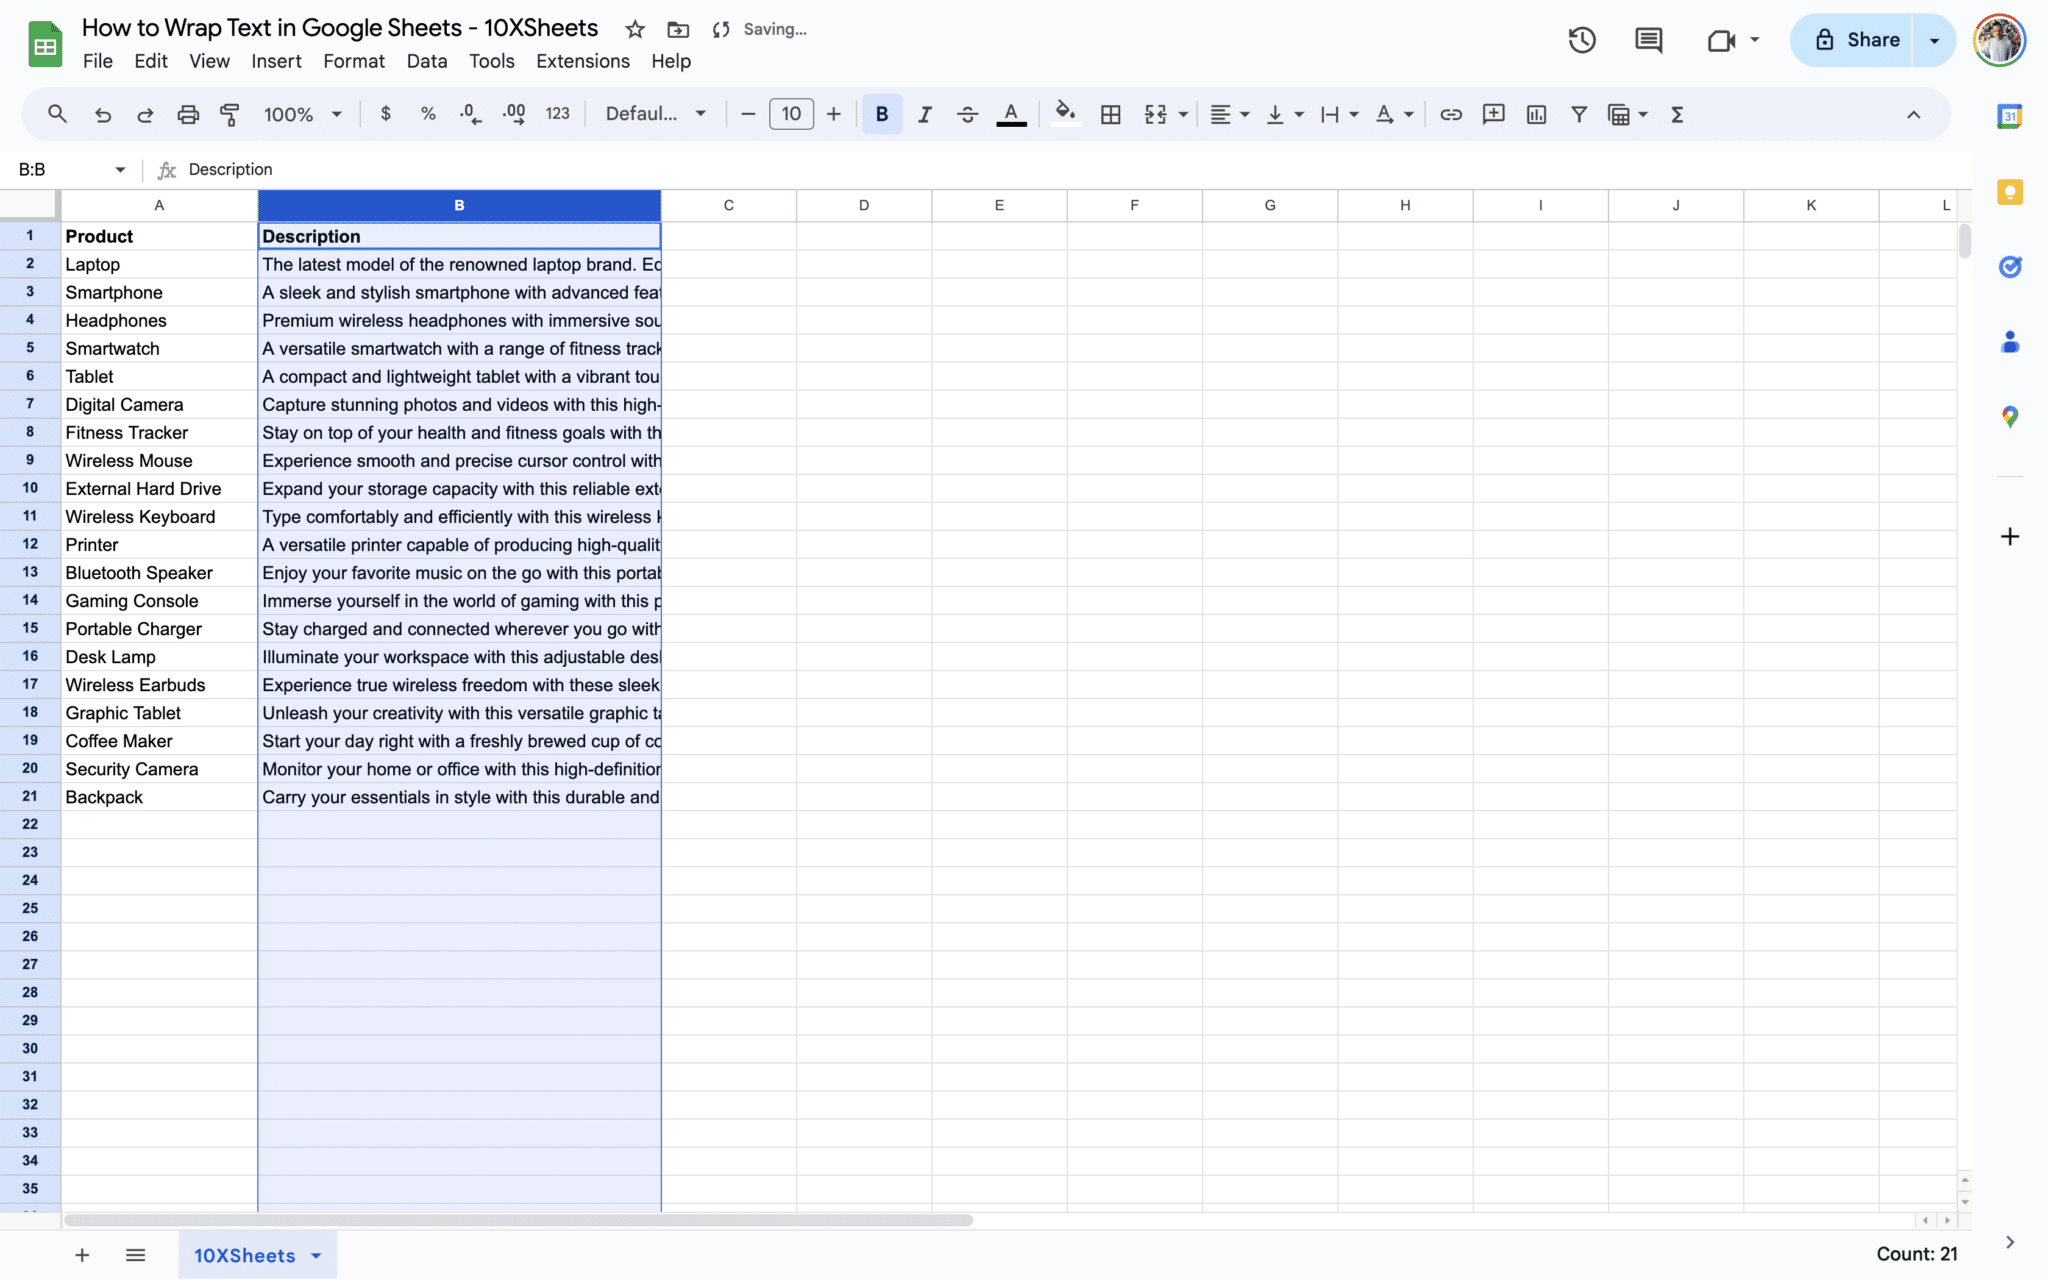
Overflow: Displaying Full Text Beyond Cell Boundaries
Overflow is another text-wrapping option in Google Sheets that allows the full text content to extend beyond the boundaries of a cell. When overflow is enabled for a cell, any text that exceeds the cell width will continue to be displayed, extending into adjacent cells. This option is useful when you want to ensure that all content remains visible, even if it extends beyond the cell’s width.
To Enable Overflow:
- Select the Cell: Click on the cell containing the text you want to apply overflow to.
- Format Menu: Navigate to the “Format” menu at the top of the Google Sheets interface.
- Text Wrapping: Click on “Text wrapping” within the “Format” menu.
- Overflow Option: Choose the “Overflow” option from the dropdown menu.
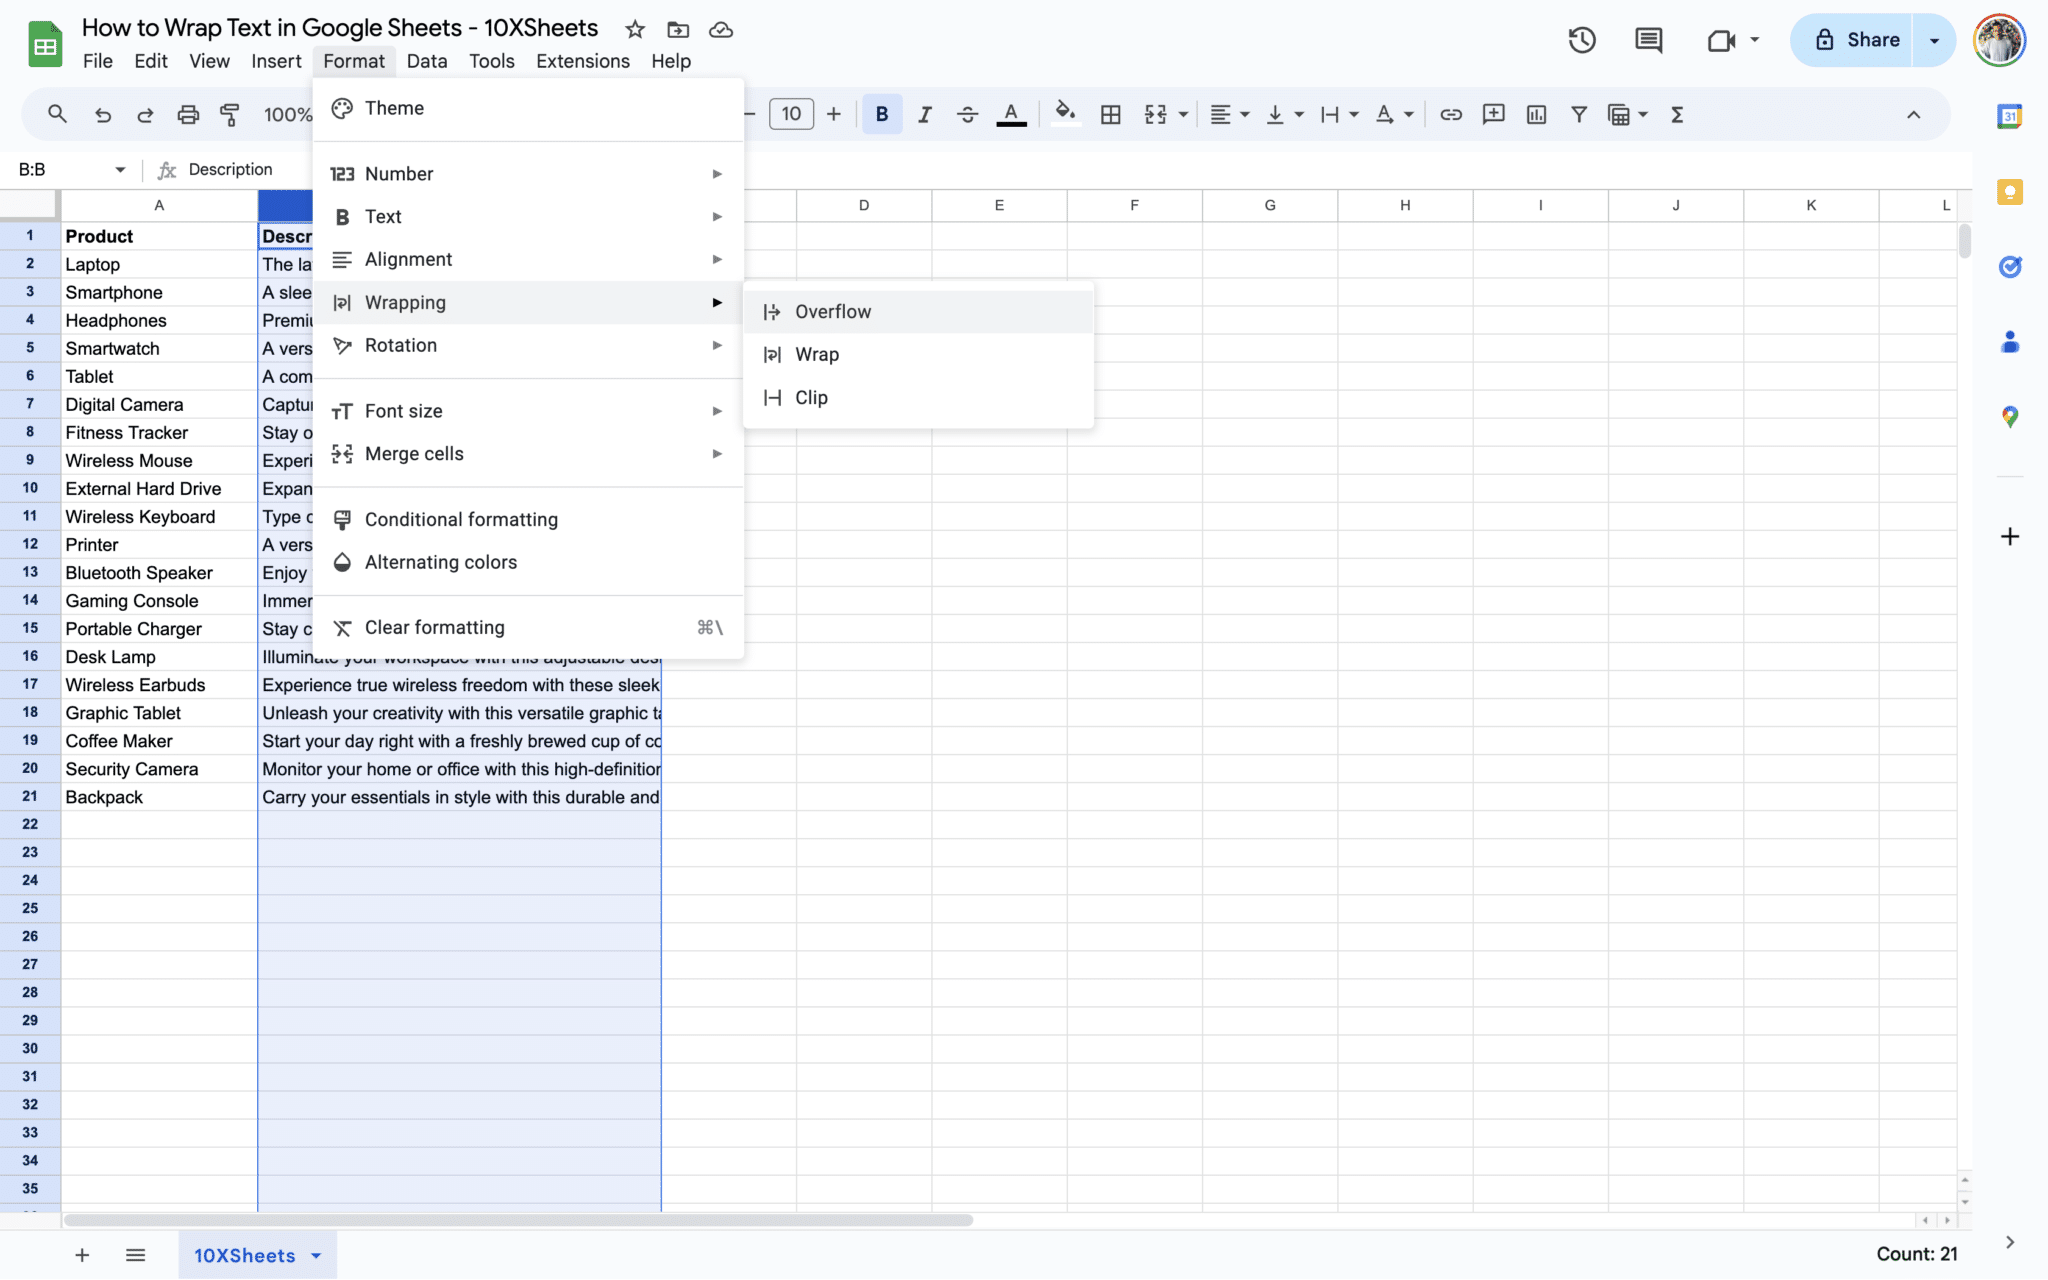
By enabling overflow, you allow the full text content to display without truncation, ensuring that no information is cut off and users can access all the data within the cell.
Dealing with Overflowing Text
Overflowing text poses a challenge in maintaining data integrity and readability.
Strategies for Handling Overflow
When faced with overflowing text, consider employing the following strategies to effectively manage the situation:
- Increase Column Width: Expand the column width to accommodate the overflowing text fully.
- Reduce Font Size: Decrease the font size to fit more text within the cell without overflowing.
- Use Abbreviations: Utilize abbreviations or shorten the text where possible to reduce its length.
By implementing these strategies, you can prevent text overflow and ensure that all information remains visible and comprehensible within your spreadsheet.
Using Text Overflow Indicators
Google Sheets provides text overflow indicators to signal when text within a cell exceeds its visible boundaries:
- Indicator Display: A small indicator appears in the corner of cells containing overflowed text.
- Hover Functionality: Hovering over the indicator reveals the full content of the overflowed text, allowing users to access the complete information.
By leveraging text overflow indicators, users can easily identify and access overflowed text, ensuring that no information goes unnoticed or overlooked.
Tips and Tricks for Efficient Text Wrapping
Now, we’ll go through various tips and tricks to enhance your text wrapping experience in Google Sheets. From keyboard shortcuts to advanced techniques like conditional formatting and data validation, these strategies will help you efficiently manage text wrapping and optimize your spreadsheet workflow.
Keyboard Shortcuts for Text Wrapping
Mastering keyboard shortcuts can significantly improve your efficiency when working with text wrapping tasks in Google Sheets. Here are some essential shortcuts to streamline your workflow:
- Ctrl + Enter: This shortcut quickly applies manual text wrapping to the selected cell or range of cells.
- Ctrl + Shift + V: Use this shortcut to paste text into cells while automatically applying text wrapping to fit the content within the column width.
By incorporating these keyboard shortcuts into your workflow, you can expedite text wrapping tasks and work more efficiently in Google Sheets.
Utilizing Conditional Formatting for Text Overflow
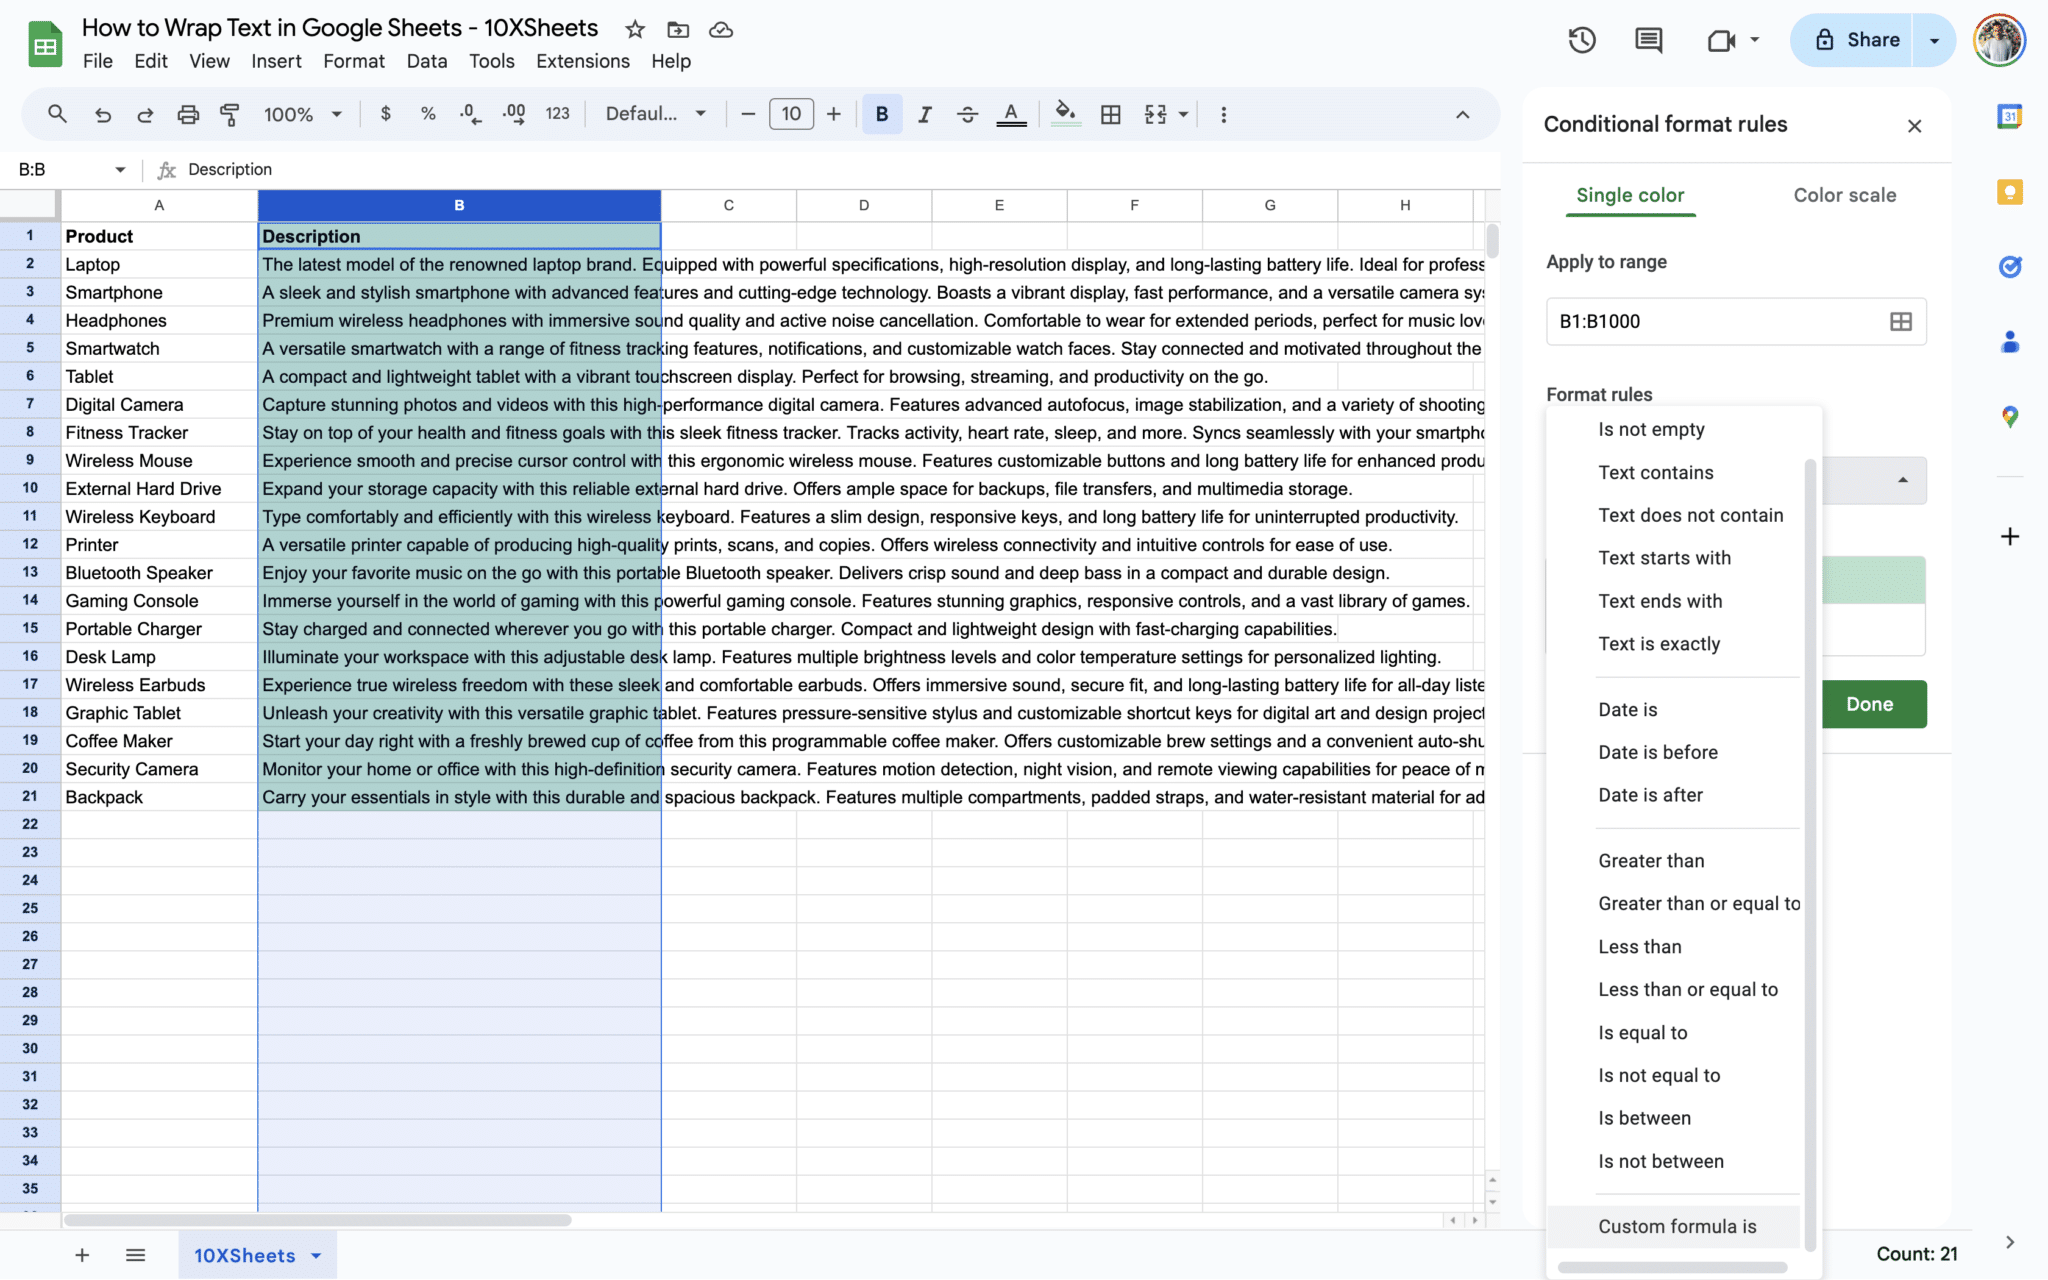
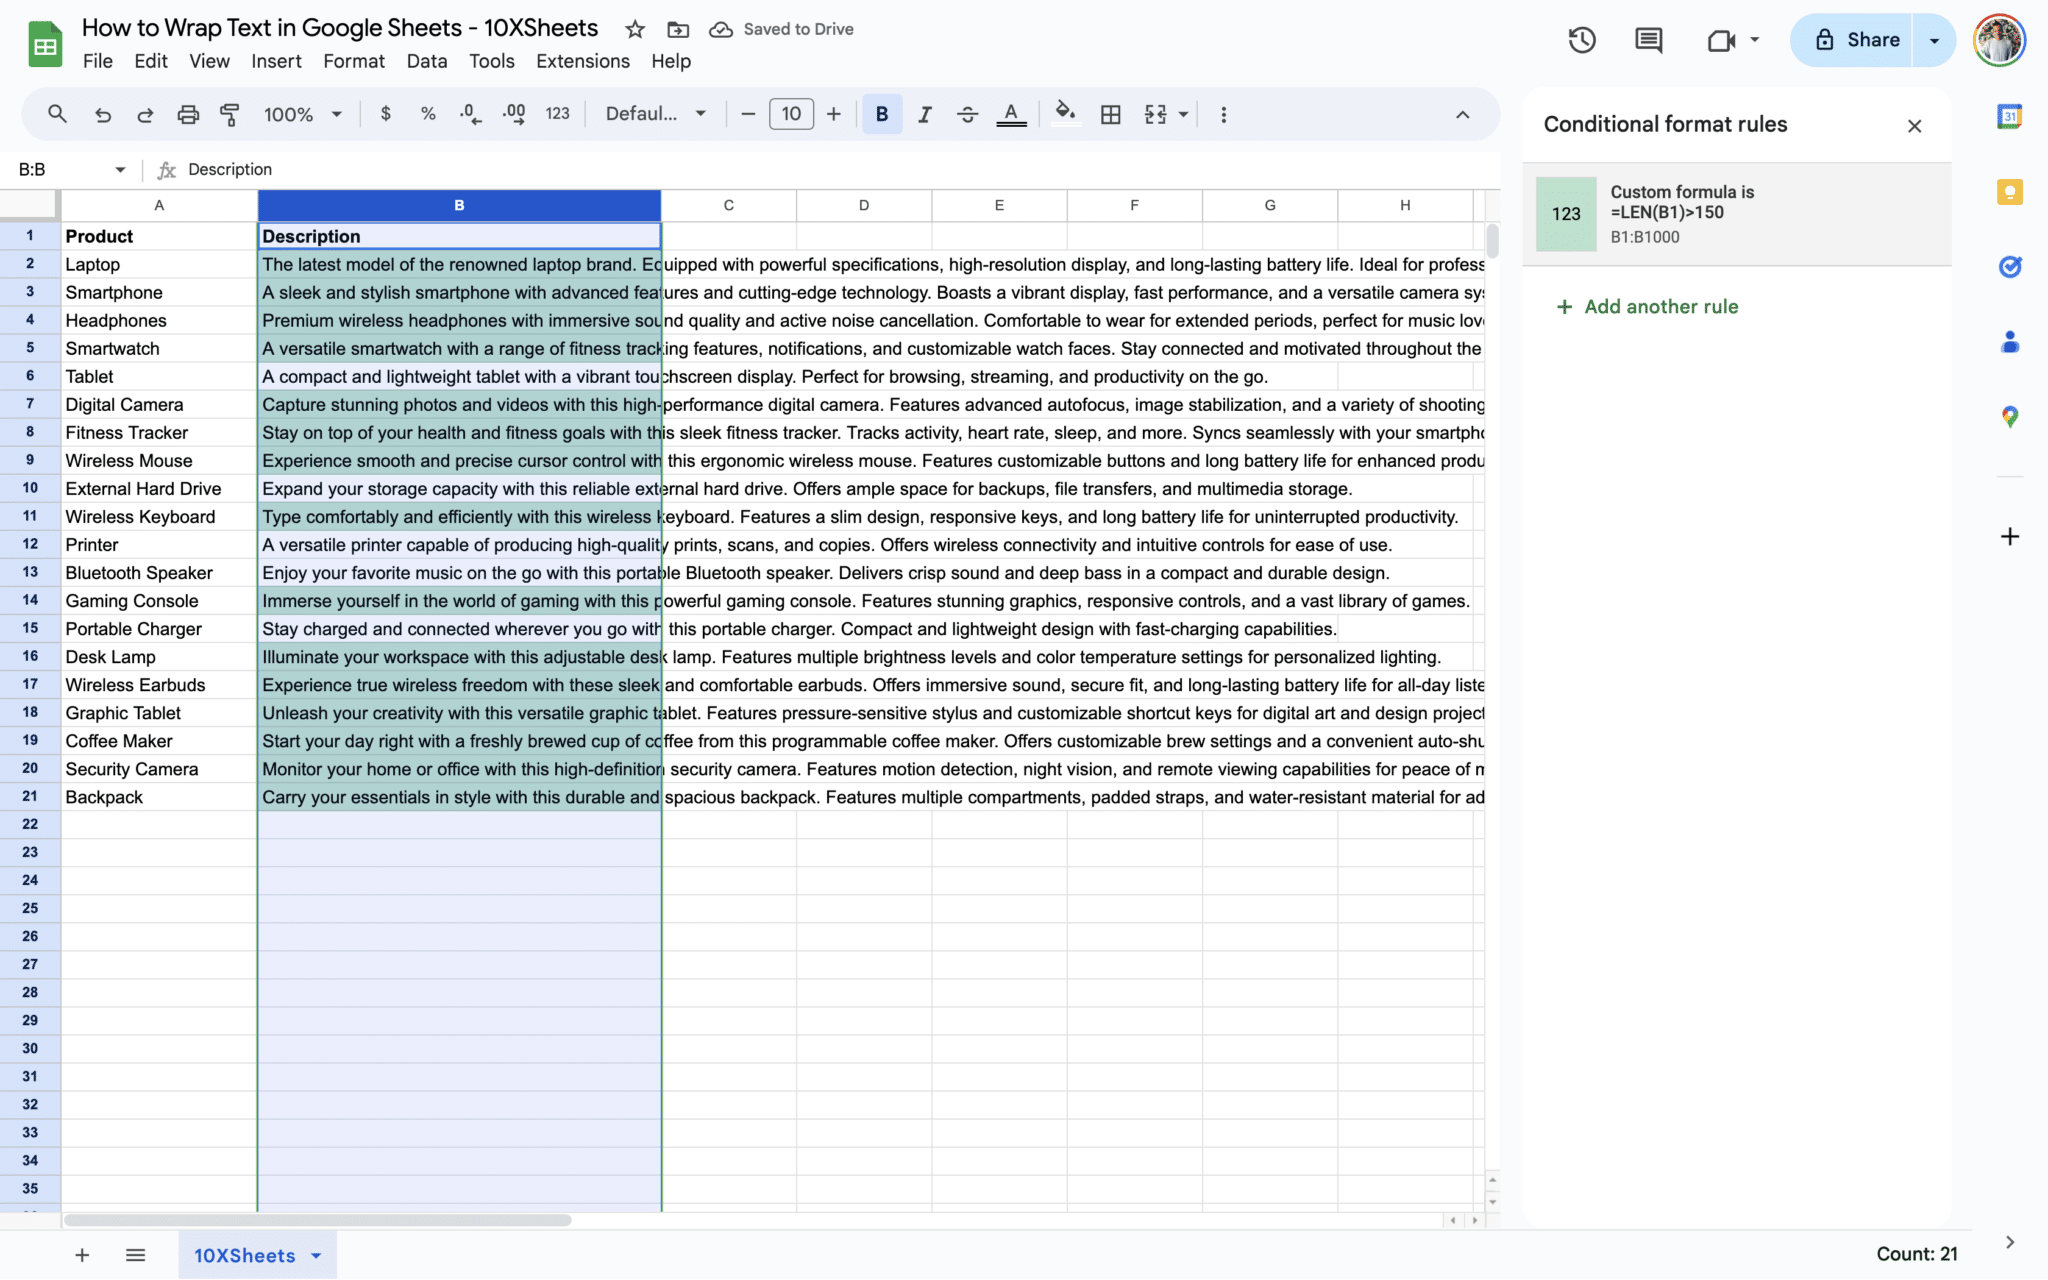
Conditional formatting is a powerful tool that allows you to visually highlight cells with overflowing text, making it easier to identify and address overflow issues. Here’s how you can utilize conditional formatting for text overflow:
- Select Cells: Highlight the range of cells containing text that may overflow.
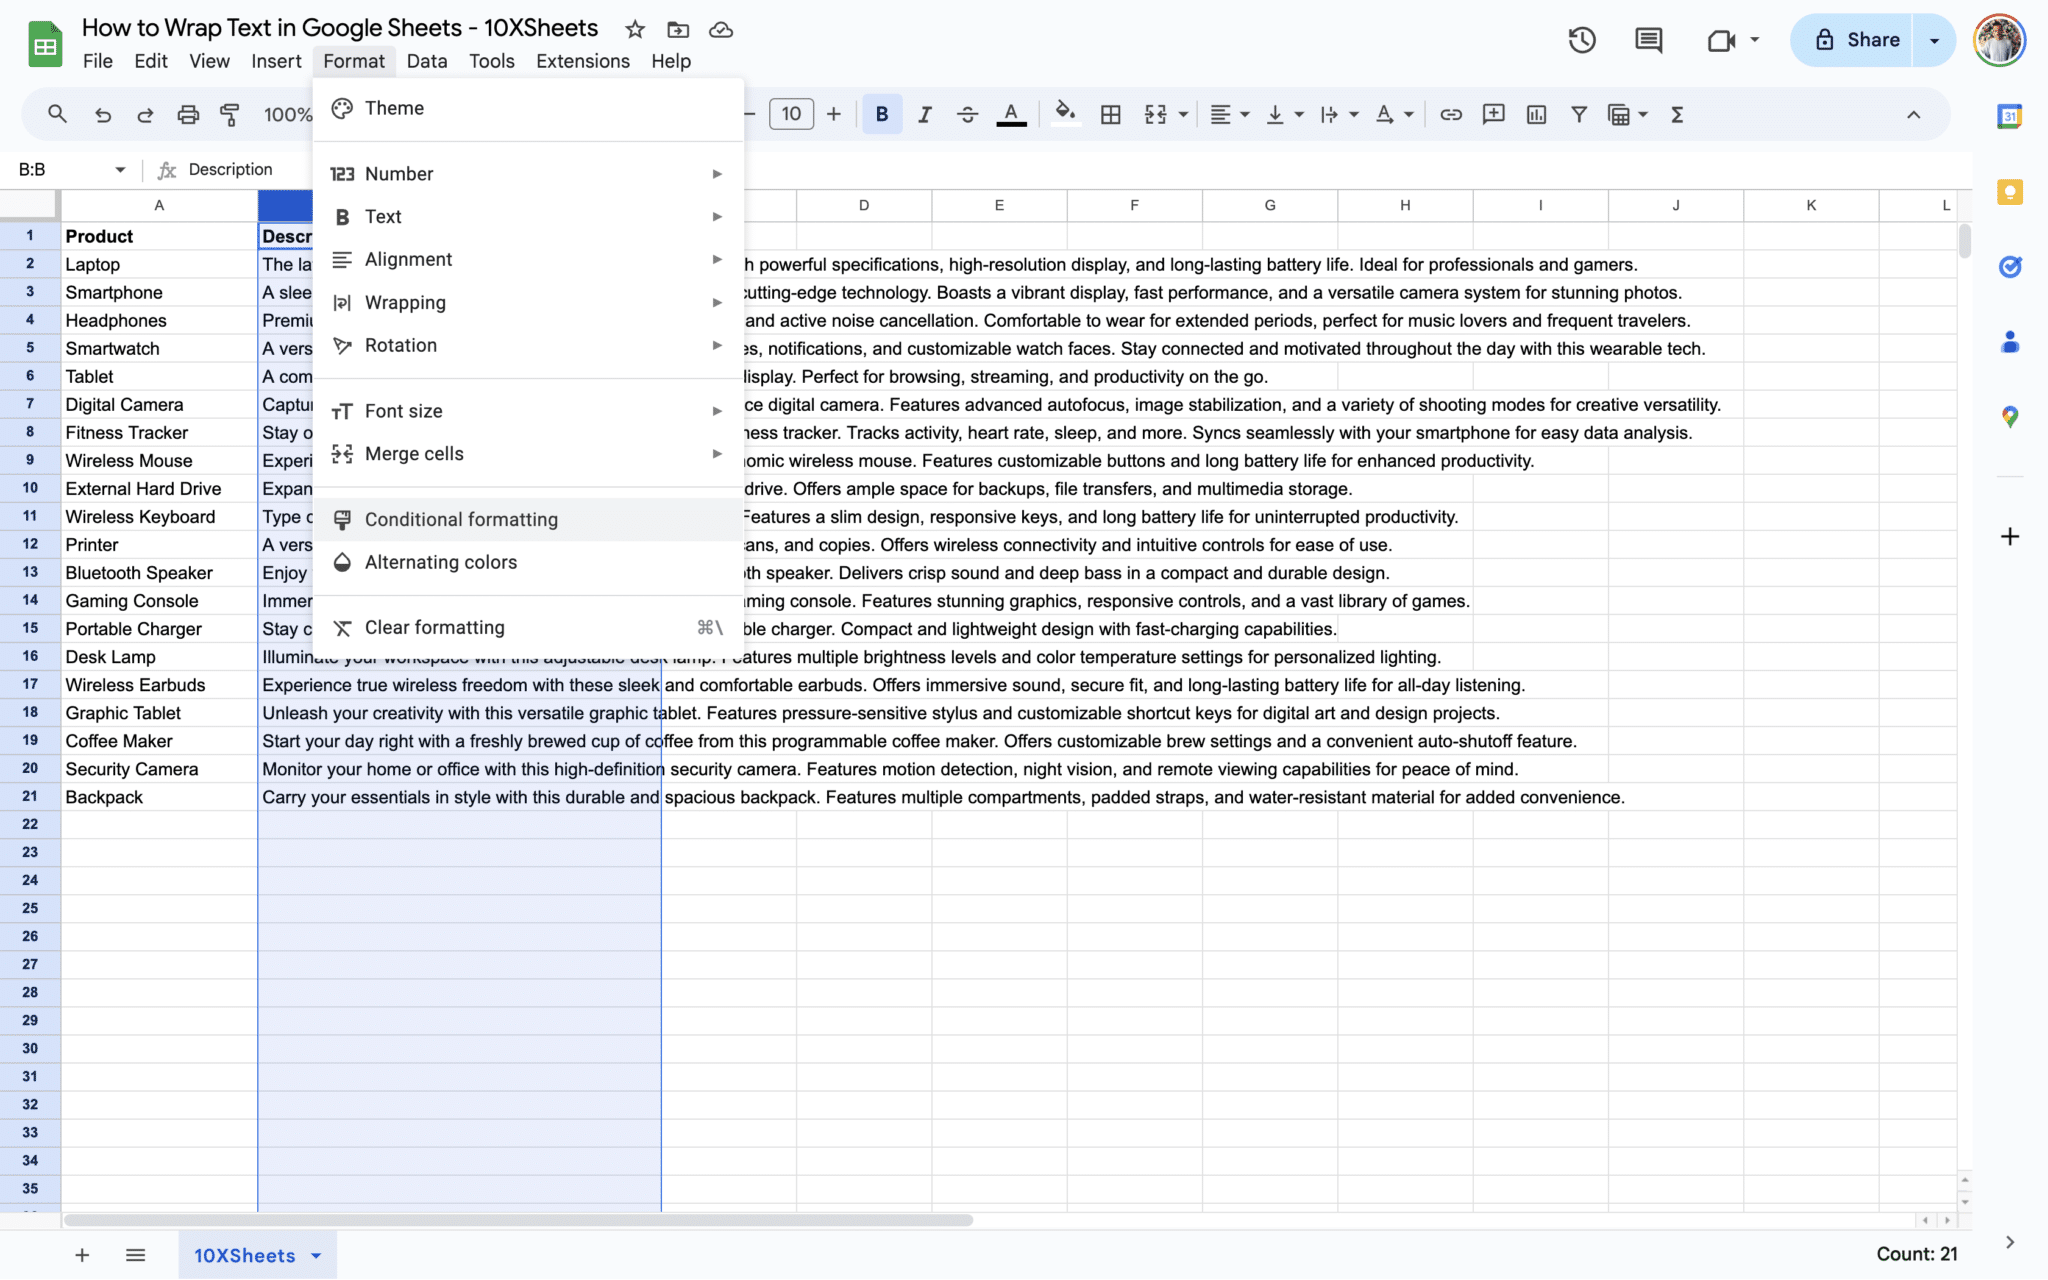
- Conditional Formatting: Navigate to the “Format” menu and select “Conditional formatting.”
- Custom Rule: Create a new conditional formatting rule with a formula to detect overflow, such as
=LEN(B1)>150(where B1 is the cell reference and 150 is the maximum character limit).
- Formatting Style: Choose a formatting style, such as text color or cell background color, to visually highlight cells with overflowing text.
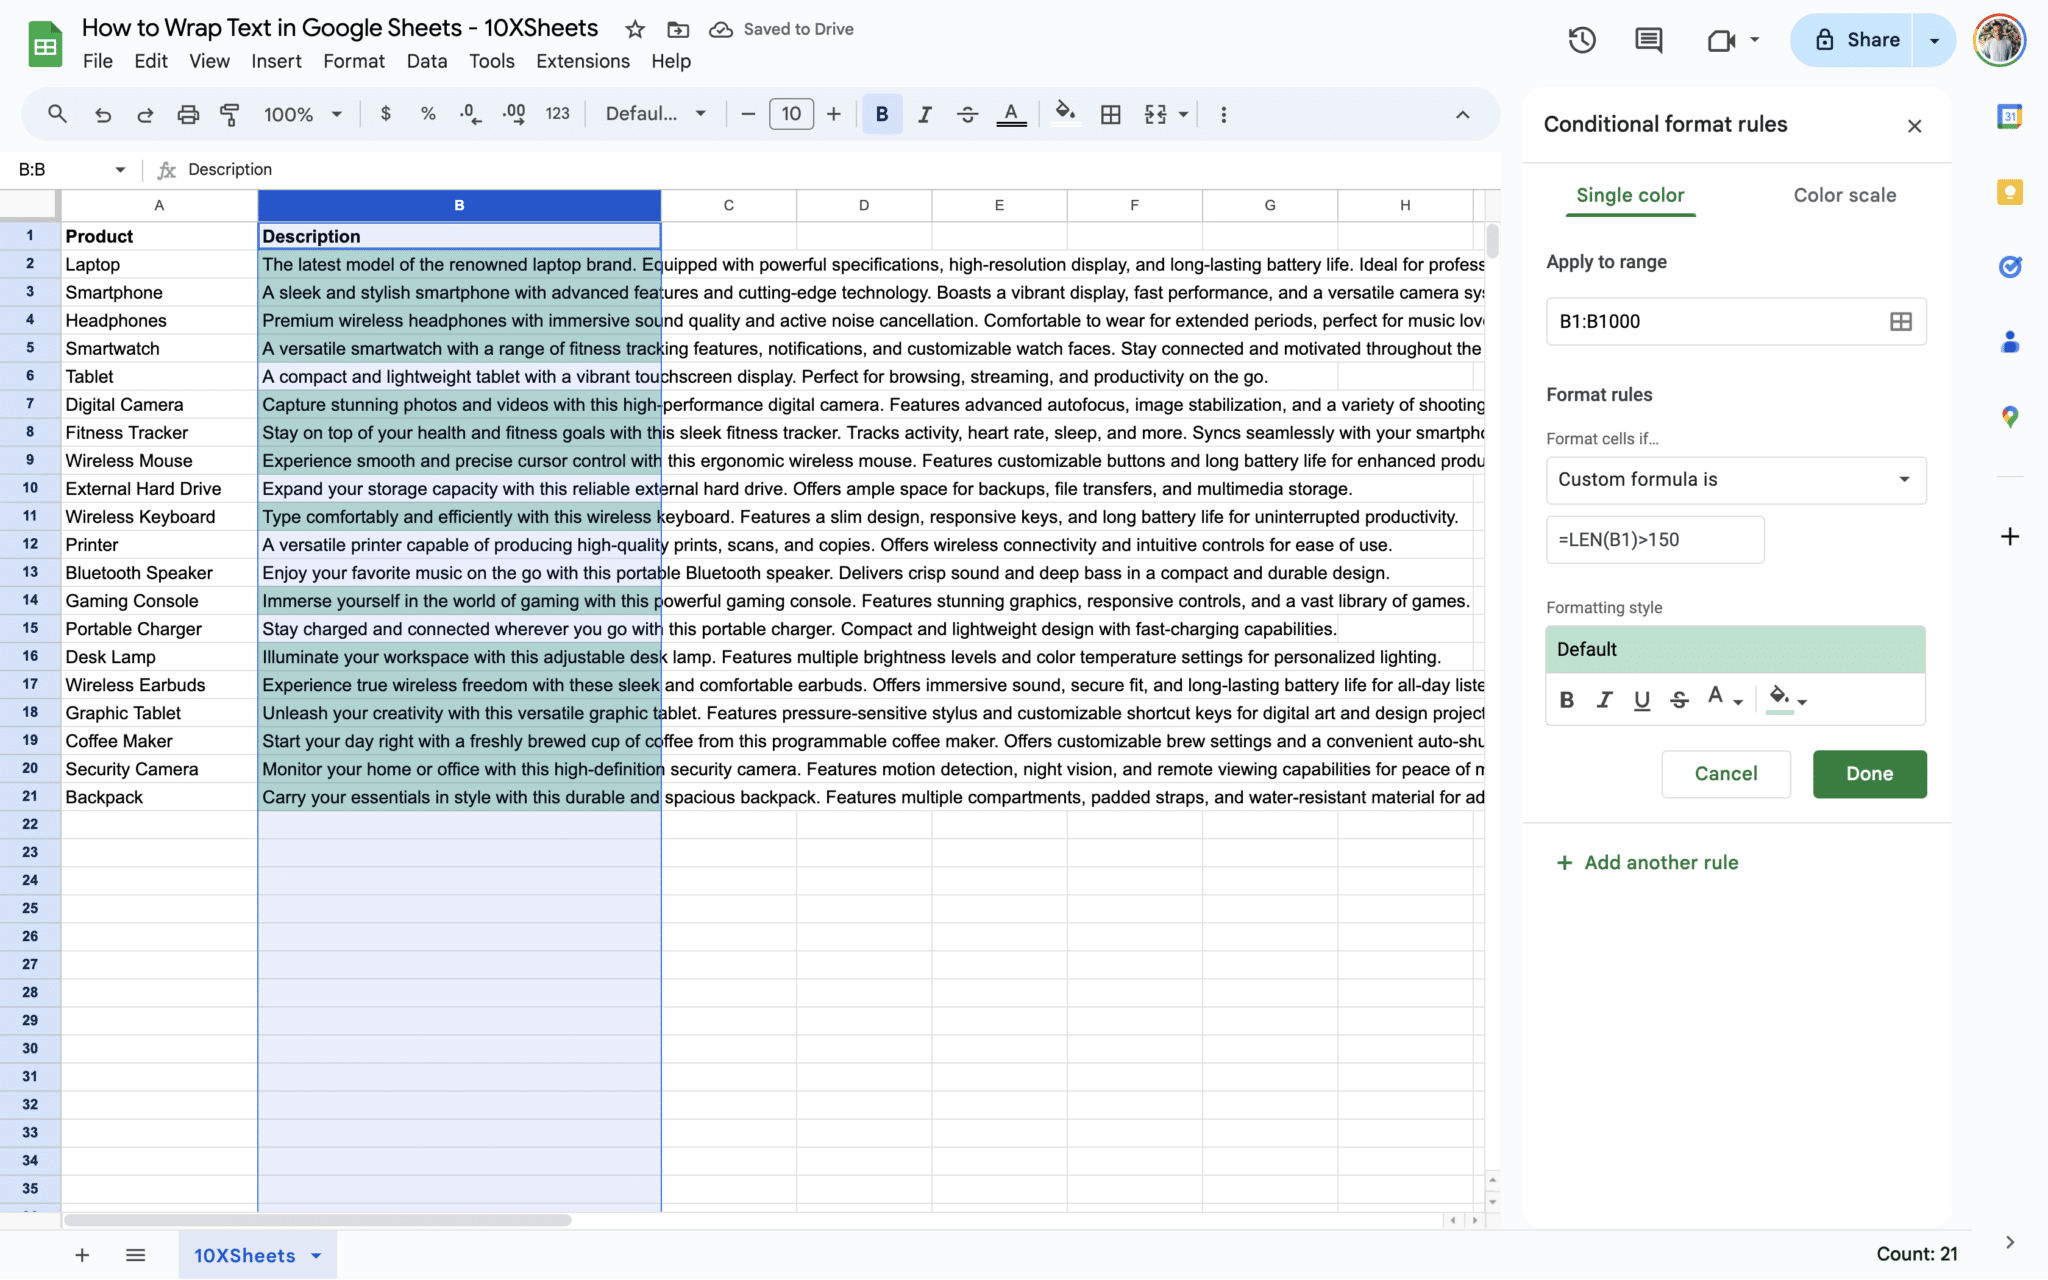
By applying conditional formatting, you can easily spot cells with overflowing text and take appropriate action to ensure data visibility and integrity.
Combining Text Wrapping with Data Validation
Integrating text wrapping with data validation provides an additional layer of control over the content entered into cells, ensuring consistency and accuracy. Here’s how you can combine text wrapping with data validation:
- Data Validation: Set up data validation rules to restrict the type or length of data entered into specific cells.
- Text Wrapping: Apply text wrapping to the cells where data validation rules are enforced.
For example, you can use data validation to allow only certain characters or limit the length of text entered into cells, while text wrapping ensures that the entered data is displayed properly within the cell boundaries.
By combining text wrapping with data validation, you maintain data consistency and presentation standards throughout your spreadsheet, enhancing its overall usability and effectiveness.
Troubleshooting Common Text Wrapping Issues in Google Sheets
Encountering issues with text wrapping in Google Sheets can disrupt your workflow and hinder effective data presentation. We’ll address common challenges and provide solutions to troubleshoot these issues, ensuring smooth sailing in your spreadsheet endeavors.
Text Cutting Off After Wrapping
Text cutting off after wrapping can occur when the row height is insufficient to display the wrapped text fully. Here’s how you can troubleshoot and resolve this issue:
- Adjust Row Height: Double-click on the row divider or drag it manually to increase the row height until all wrapped text is visible.
- Wrap Text Manually: If increasing the row height doesn’t solve the issue, try manually wrapping the text again to ensure proper formatting.
By adjusting the row height and verifying text wrapping settings, you can prevent text from being cut off after wrapping and ensure complete visibility of your data.
Inconsistent Text Wrapping Behavior
Inconsistent text wrapping behavior can result from conflicting formatting settings or discrepancies in cell dimensions. Here’s how you can troubleshoot and address this issue:
- Check Formatting: Verify that all cells within a range have the same text wrapping settings to maintain consistency.
- Reset Formatting: If inconsistencies persist, reset cell formatting to default settings and reapply text wrapping as needed.
- Adjust Column Width: Ensure that column widths are uniform to prevent text wrapping variations across different columns.
By maintaining uniform formatting settings and dimensions across your spreadsheet, you can eliminate inconsistencies in text wrapping behavior and achieve a cohesive presentation of your data.
Compatibility Issues with Imported Data
When importing data into Google Sheets, compatibility issues may arise, affecting text wrapping and overall formatting. Here’s how you can mitigate compatibility issues and ensure smooth data integration:
- Review Data Formatting: Check the formatting of imported data to ensure compatibility with Google Sheets’ text wrapping settings.
- Adjust Formatting: If necessary, adjust cell formatting, including text wrapping, to accommodate imported data without compromising its integrity.
- Test Compatibility: Conduct compatibility tests with sample data to identify and address any formatting discrepancies before importing large datasets.
By proactively addressing compatibility issues and adjusting formatting as needed, you can seamlessly integrate imported data into your Google Sheets spreadsheet while preserving text wrapping and overall presentation standards.
Best Practices for Text Wrapping in Google Sheets
To ensure efficient data presentation and collaboration in Google Sheets, it’s essential to follow best practices for text wrapping.
Consistency in Text Wrapping Across Sheets
Consistency in text wrapping ensures uniformity and readability across different sheets within your spreadsheet. Here’s how you can achieve consistency:
- Standardize Formatting: Establish standardized text wrapping settings, including row heights and column widths, across all sheets in your spreadsheet.
- Template Creation: Create a template with predefined text wrapping settings for consistency in future spreadsheets.
- Regular Review: Periodically review and update text wrapping settings to maintain consistency as your spreadsheet evolves.
By maintaining consistency in text wrapping across sheets, you create a cohesive and professional presentation of your data, enhancing readability and usability.
Optimizing Text Wrapping for Printing
Optimizing text wrapping for printing ensures that your spreadsheet maintains its readability and formatting when printed on paper.
- Print Preview: Use the print preview feature in Google Sheets to preview how text wrapping will appear on paper before printing.
- Adjust Page Setup: Adjust page setup options such as margins and scaling to optimize text wrapping for printing.
- Test Printing: Print a test sheet to verify text wrapping and formatting before printing large batches of spreadsheets.
By optimizing text wrapping for printing, you can ensure that your data remains legible and well-presented in both digital and physical formats.
Collaboration Tips for Text-Wrapped Sheets
Collaborating on text-wrapped sheets requires effective communication and coordination to maintain consistency and accuracy. Here are some collaboration tips:
- Document Guidelines: Document text wrapping guidelines and share them with collaborators to ensure consistency in formatting.
- Use Comments: Utilize comments to provide feedback or instructions on text wrapping settings within the spreadsheet.
- Version Control: Implement version control mechanisms to track changes to text wrapping settings and revert to previous versions if necessary.
By following these collaboration tips, you can streamline communication and collaboration on text-wrapped sheets, fostering a productive and efficient workflow for all stakeholders involved.
Conclusion
Mastering text wrapping in Google Sheets is a valuable skill that can greatly enhance the presentation and readability of your data. By following the techniques outlined in this guide, you can ensure that all your information remains fully visible and neatly organized within your spreadsheet. Whether you’re manually wrapping text, utilizing keyboard shortcuts, or optimizing for printing, these methods empower you to create professional-looking spreadsheets that effectively convey your message.
Furthermore, by troubleshooting common issues and adhering to best practices, you can streamline your workflow and collaborate more effectively with others. Remember to maintain consistency in text wrapping across sheets, optimize for printing, and communicate guidelines with collaborators to ensure a seamless experience. With these tools and strategies at your disposal, you’re well-equipped to elevate your Google Sheets game and present your data with confidence and clarity.
Get Started With a Prebuilt Template!
Looking to streamline your business financial modeling process with a prebuilt customizable template? Say goodbye to the hassle of building a financial model from scratch and get started right away with one of our premium templates.
- Save time with no need to create a financial model from scratch.
- Reduce errors with prebuilt formulas and calculations.
- Customize to your needs by adding/deleting sections and adjusting formulas.
- Automatically calculate key metrics for valuable insights.
- Make informed decisions about your strategy and goals with a clear picture of your business performance and financial health.