Have you ever wondered how to simplify your data management in Google Sheets and add interactive checkboxes effortlessly? This guide will empower you with the knowledge and techniques to master the art of integrating checkboxes into your spreadsheets.
Whether it’s tracking tasks, managing inventory, or enhancing data analysis, checkboxes offer a versatile solution to streamline your spreadsheet tasks. Let’s dive in and explore the world of Google Sheets checkboxes together.
What Google Sheets?
In Google Sheets, checkboxes are form elements that present users with a binary choice: they can either be “checked” (representing ‘TRUE’) or “unchecked” (representing ‘FALSE’). These checkboxes are typically represented as small square boxes that can be clicked to toggle between the two states.
How Do Checkboxes Work in Google Sheets?
Checkboxes in Google Sheets operate on a binary logic system, where each checkbox can have one of two possible states: ‘TRUE’ or ‘FALSE.’
Checked: When a checkbox is “checked,” it corresponds to a ‘TRUE’ state. This means that the condition or item associated with the checkbox is considered “selected” or “active.”
Unchecked: An “unchecked” checkbox represents a ‘FALSE’ state. This indicates that the condition or item associated with the checkbox is “deselected” or “inactive.”
By toggling checkboxes between these two states, you can easily manage tasks, make selections, or track progress within your spreadsheet.
Google Sheets Checkbox Use Cases
Checkboxes in Google Sheets are incredibly versatile and find applications across various tasks and industries. Here are some common use cases where checkboxes prove to be invaluable:
Task Lists: Create to-do lists or project management sheets with checkboxes to mark completed tasks.
Inventory Management: Use checkboxes to track inventory items, indicating when items are in stock or out of stock.
Data Collection Forms: Incorporate checkboxes into data collection forms to allow respondents to make multiple selections easily.
Survey Analysis: In survey data analysis, use checkboxes to categorize responses or filter specific criteria.
Event Planning: Manage event planning by using checkboxes to confirm RSVPs, track supplies, or assign tasks to team members.
Quality Control: In quality control processes, checkboxes can indicate whether products meet certain criteria or have passed inspections.
Importance of Using Google Sheets Checkboxes
Checkboxes are more than just interactive elements; they offer several advantages that make them an essential tool in Google Sheets:
Simplicity: Checkboxes provide a straightforward way to make selections or indicate choices, enhancing user-friendliness.
Visual Clarity: Checkbox states are visually clear, making it easy to identify which items are selected or completed.
Efficiency: Checkbox automation and integration with functions streamline data management and calculations.
Organization: By using checkboxes, you can keep track of tasks, inventory, or data in a structured and organized manner.
Collaboration: Collaborators can easily understand and interact with checkboxes, improving teamwork and communication.
Data Analysis: Checkbox values can be utilized in functions like ‘COUNTIF’ and conditional formatting, enabling data-driven insights.
Checkboxes in Google Sheets are a powerful tool that simplifies data management, enhances organization, and improves collaboration and data analysis. Understanding their functionality and versatility is essential for effectively using them in your spreadsheets.
How to Add a Checkbox in Google Sheets?
How to Insert a Checkbox in Google Sheets?
Adding checkboxes to your Google Sheets is a straightforward process, but let’s delve deeper into it. Checkboxes can be a game-changer for managing tasks and data efficiently.
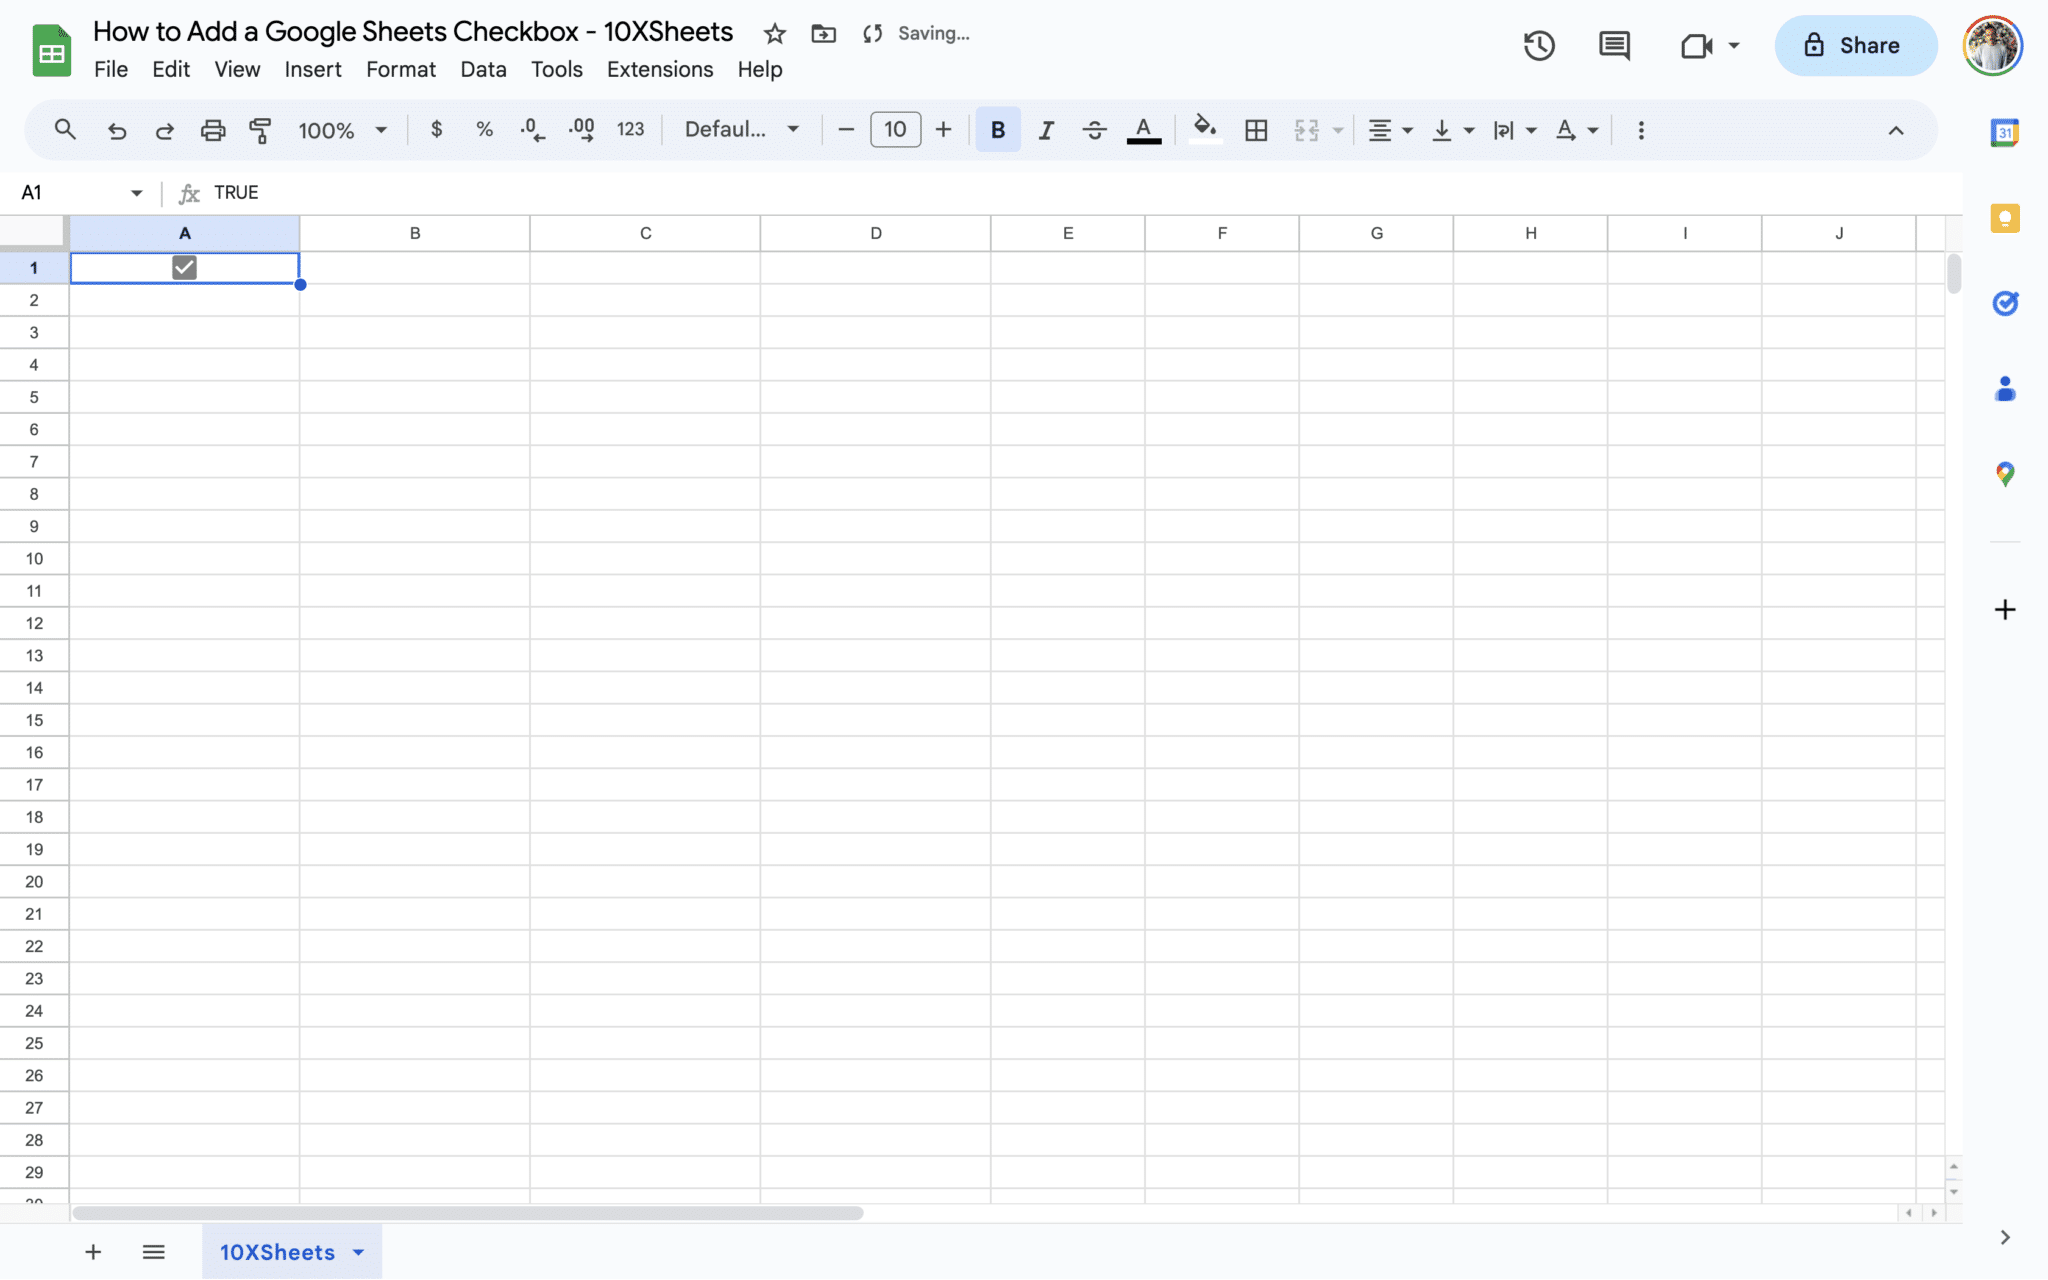
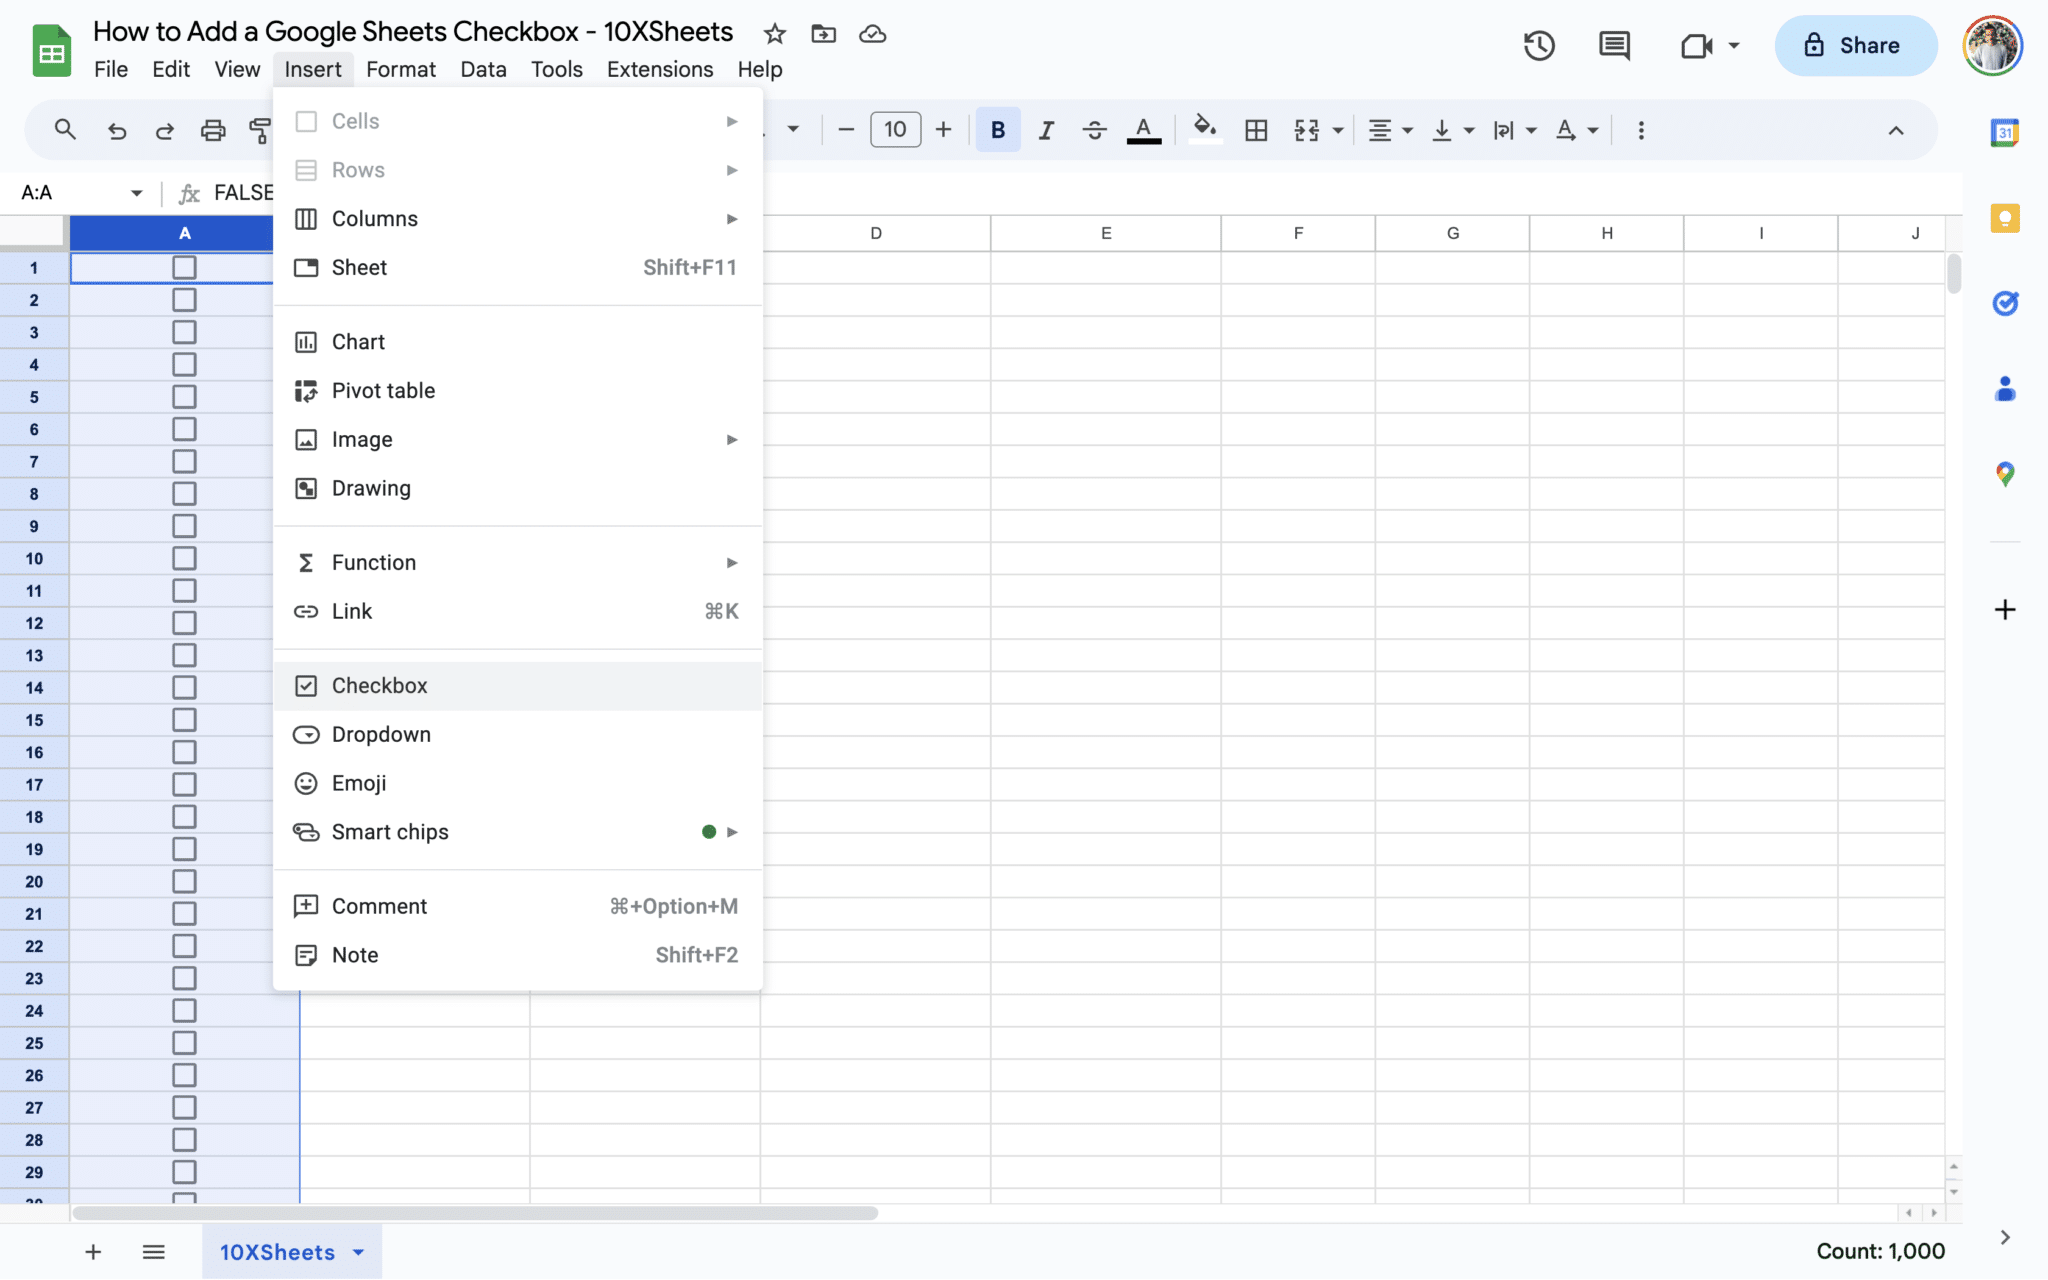
Select the Cell: Begin by selecting the cell where you want to insert a checkbox. This cell will host the checkbox control.
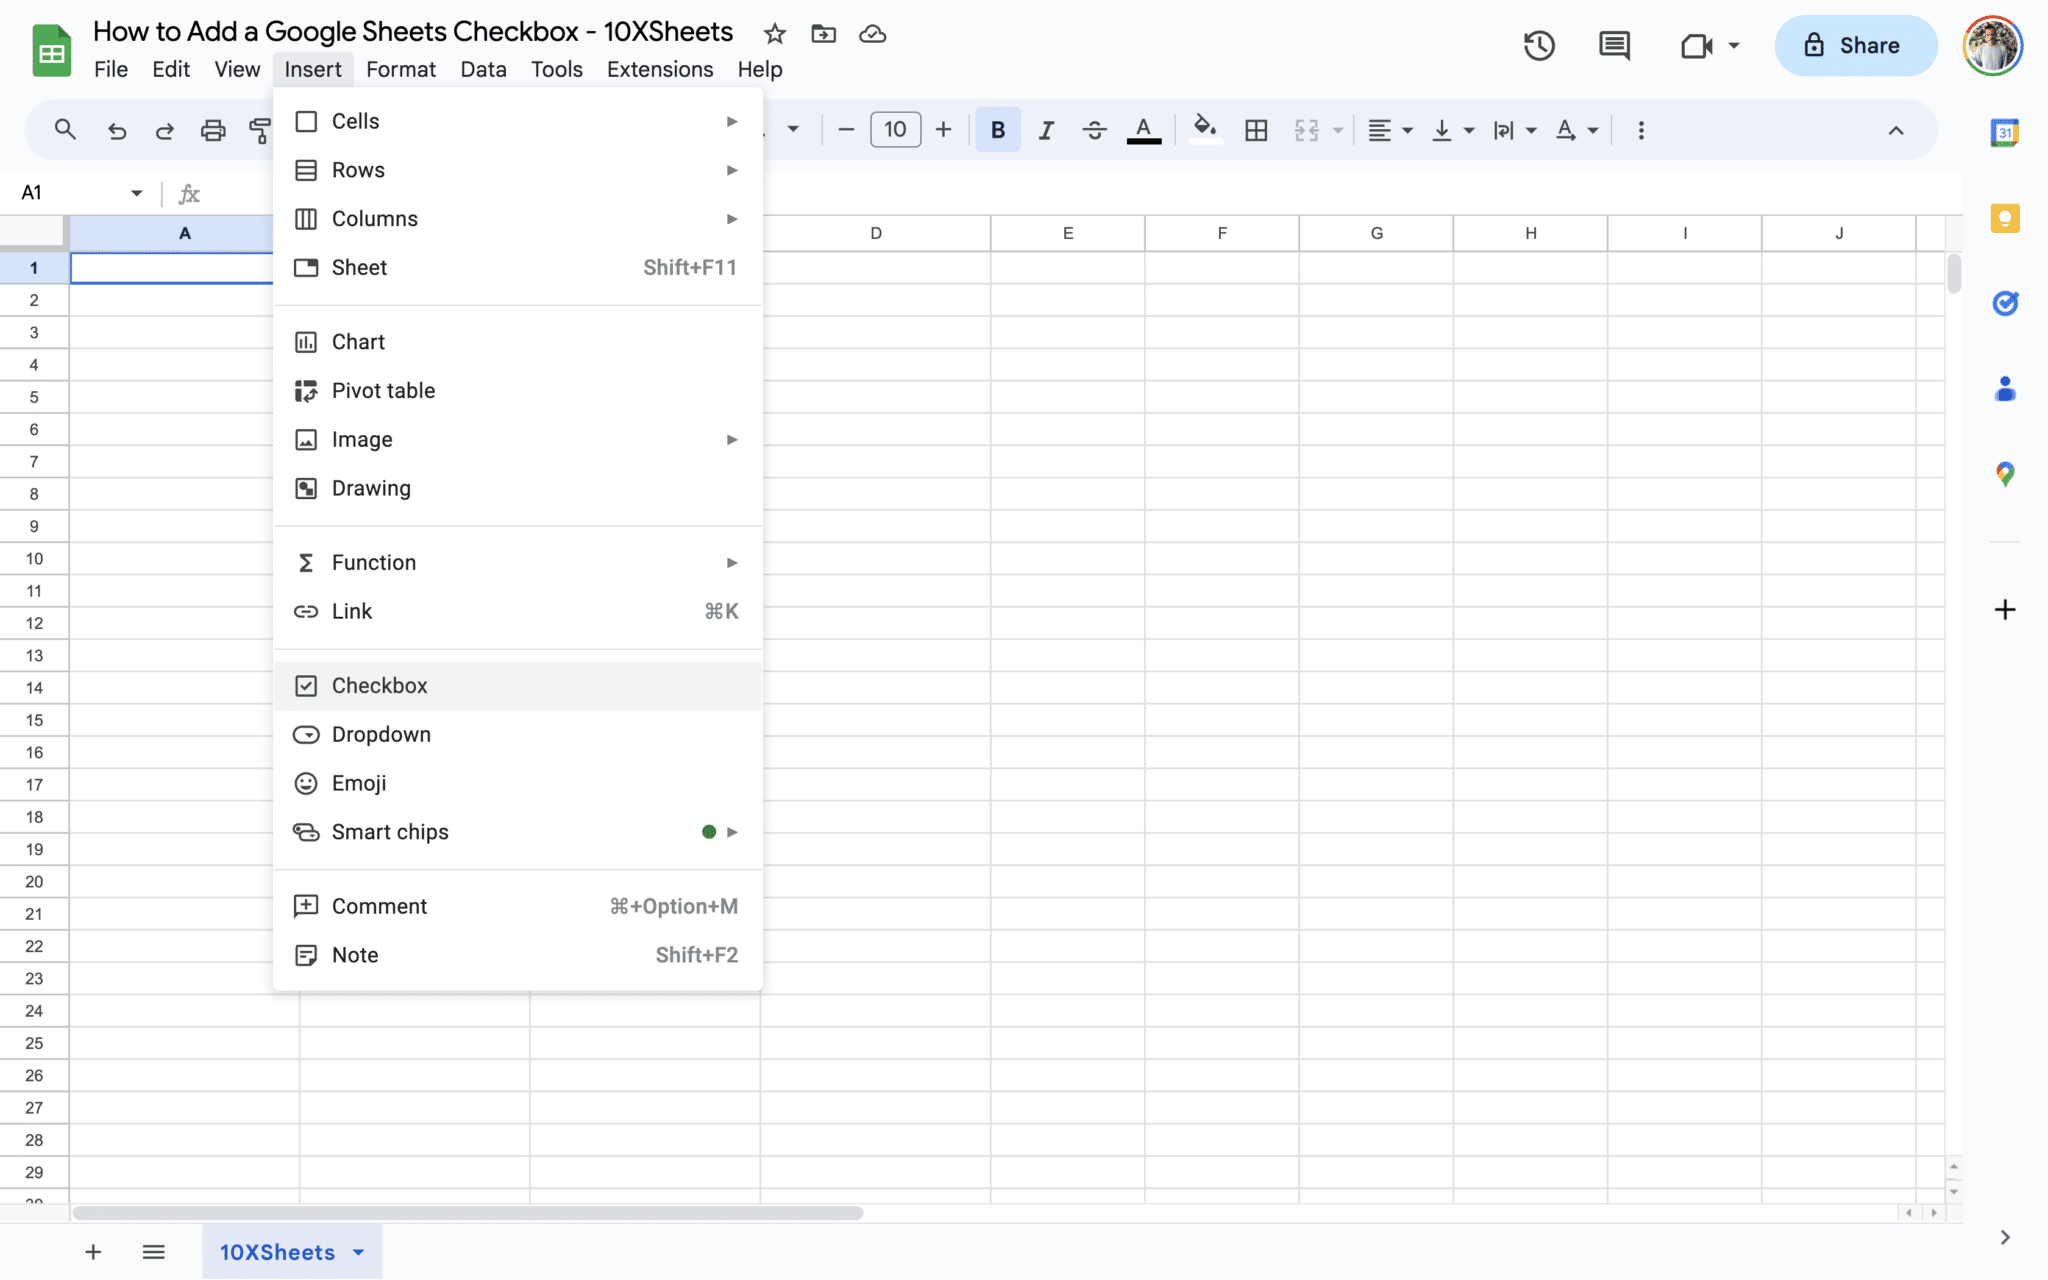
Navigate to ‘Insert’: In the top menu bar, go to Insert > Checkbox. This action will place an unchecked checkbox within the selected cell.
Understanding Default Values: It’s essential to note that when you insert a checkbox, its default value is ‘FALSE.’ This means that initially, the checkbox is unchecked.
Now that you’ve learned how to insert a basic checkbox, let’s explore how you can customize checkbox values to better suit your specific needs.
Changing Default Checkbox Values
Google Sheets provides you with the flexibility to customize the values associated with checkboxes. By default, checkboxes have ‘TRUE’ and ‘FALSE’ as their values, but you can change them to something more meaningful.
Select the Cell with the Checkbox: Click on the cell that contains the checkbox you want to customize.
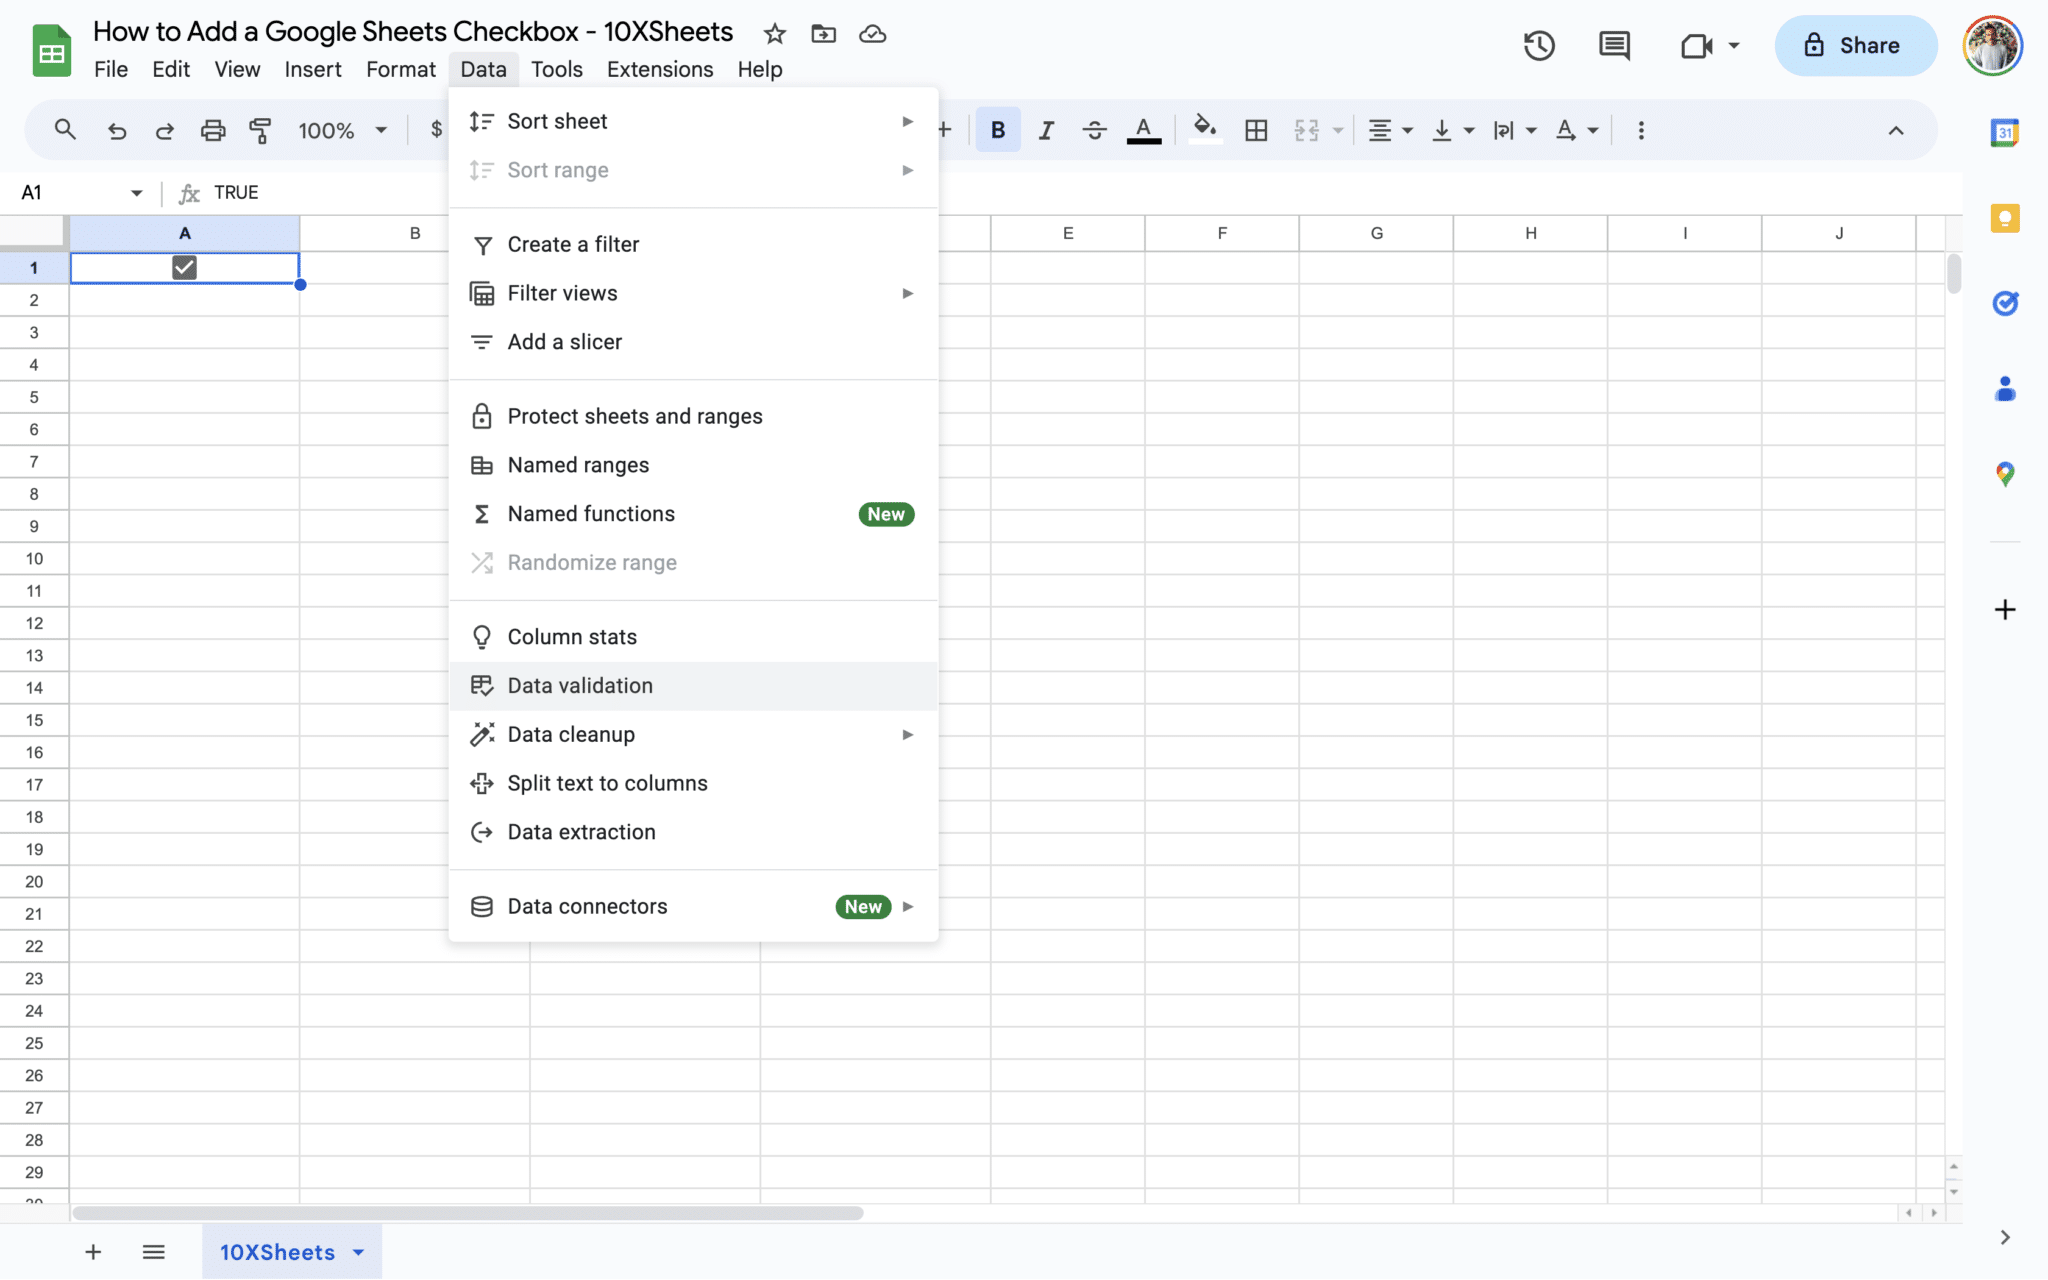
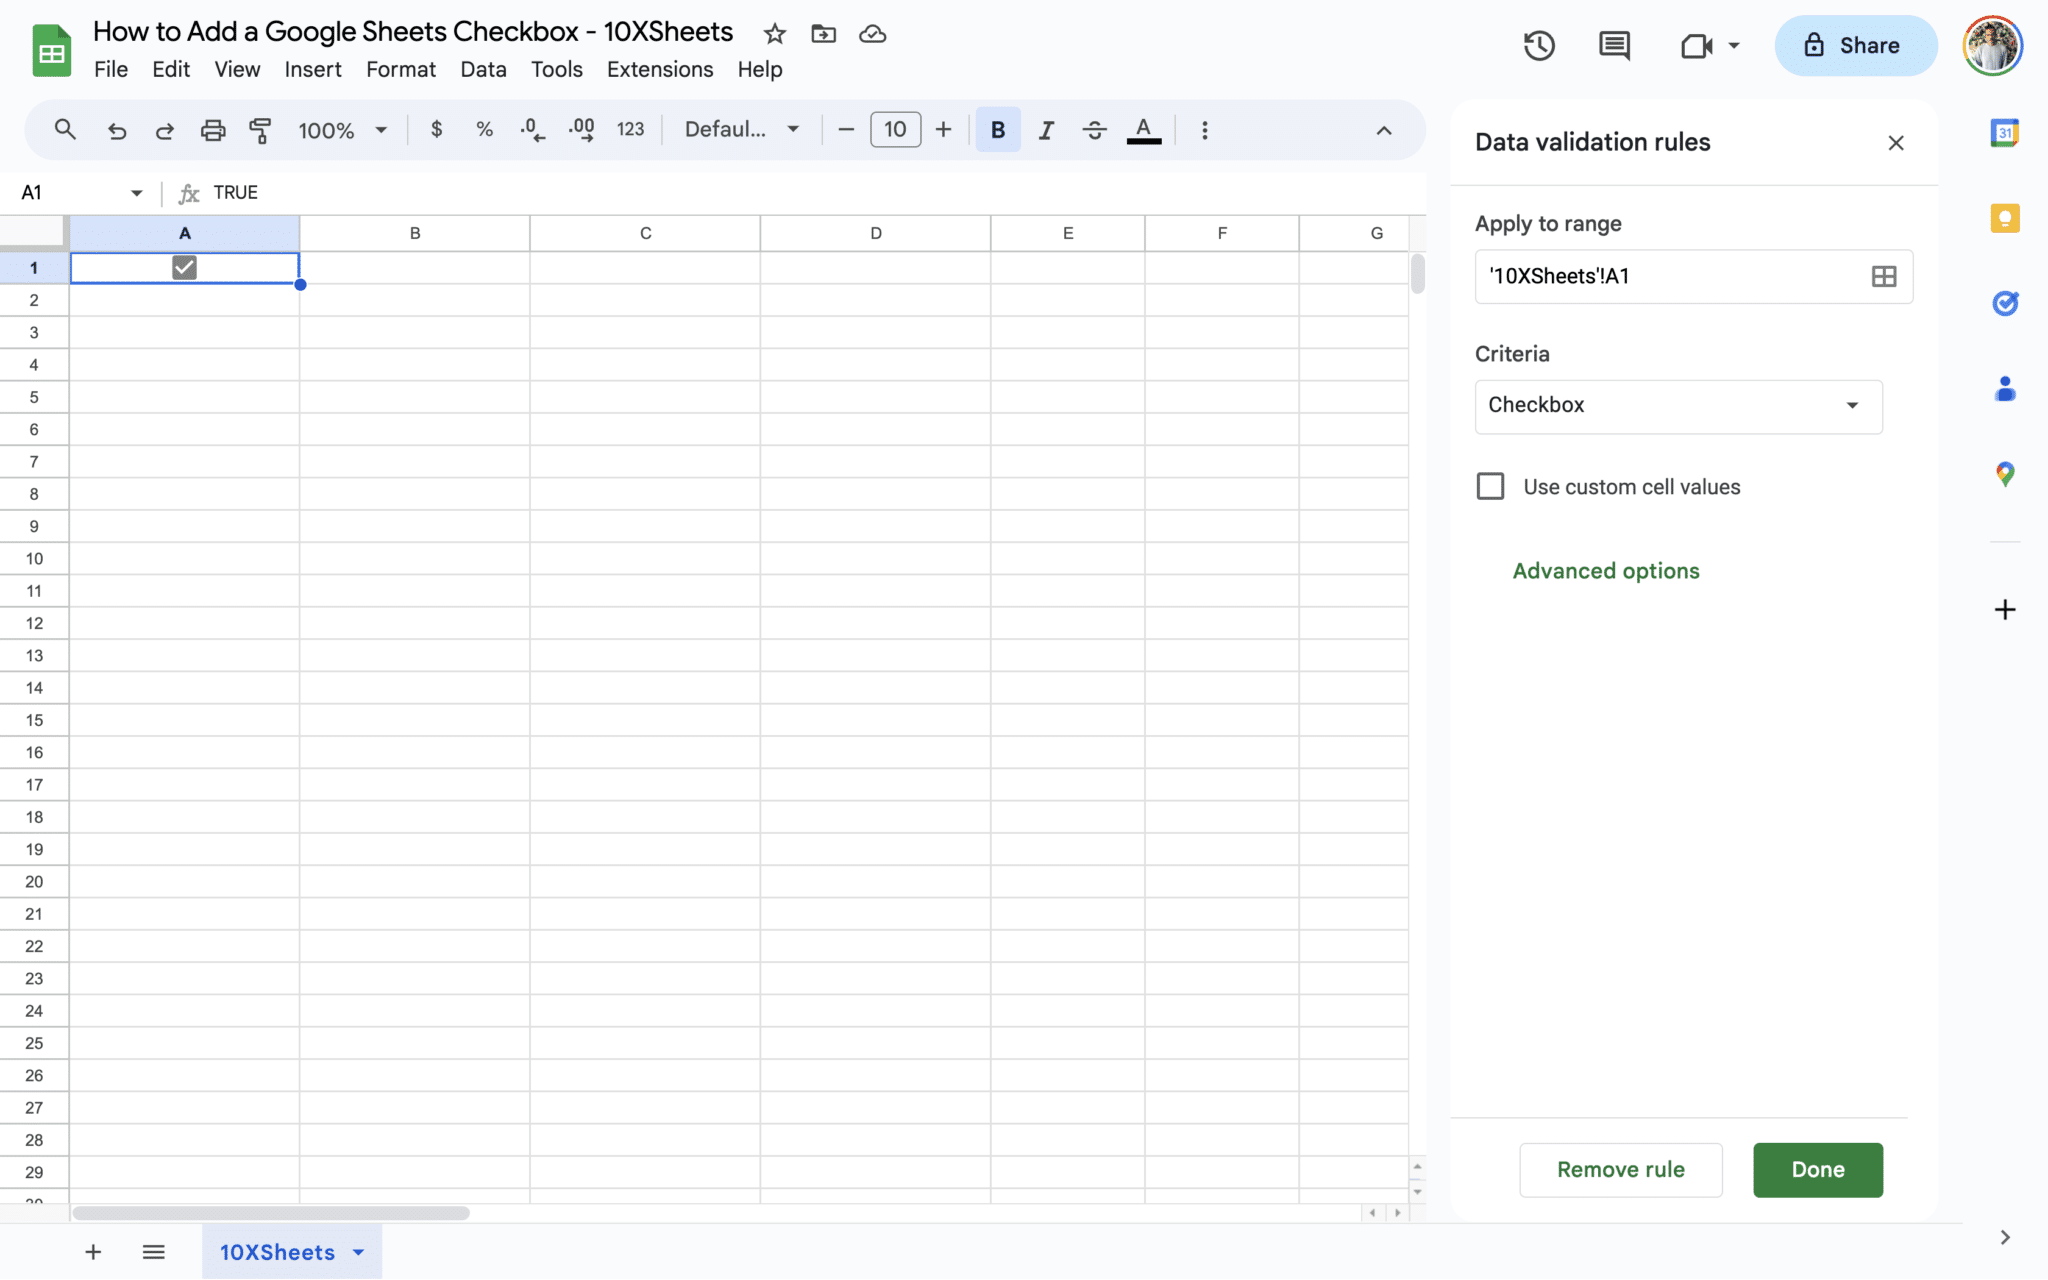
Go to ‘Data Validation’: Navigate to Data > Data Validation from the top menu.
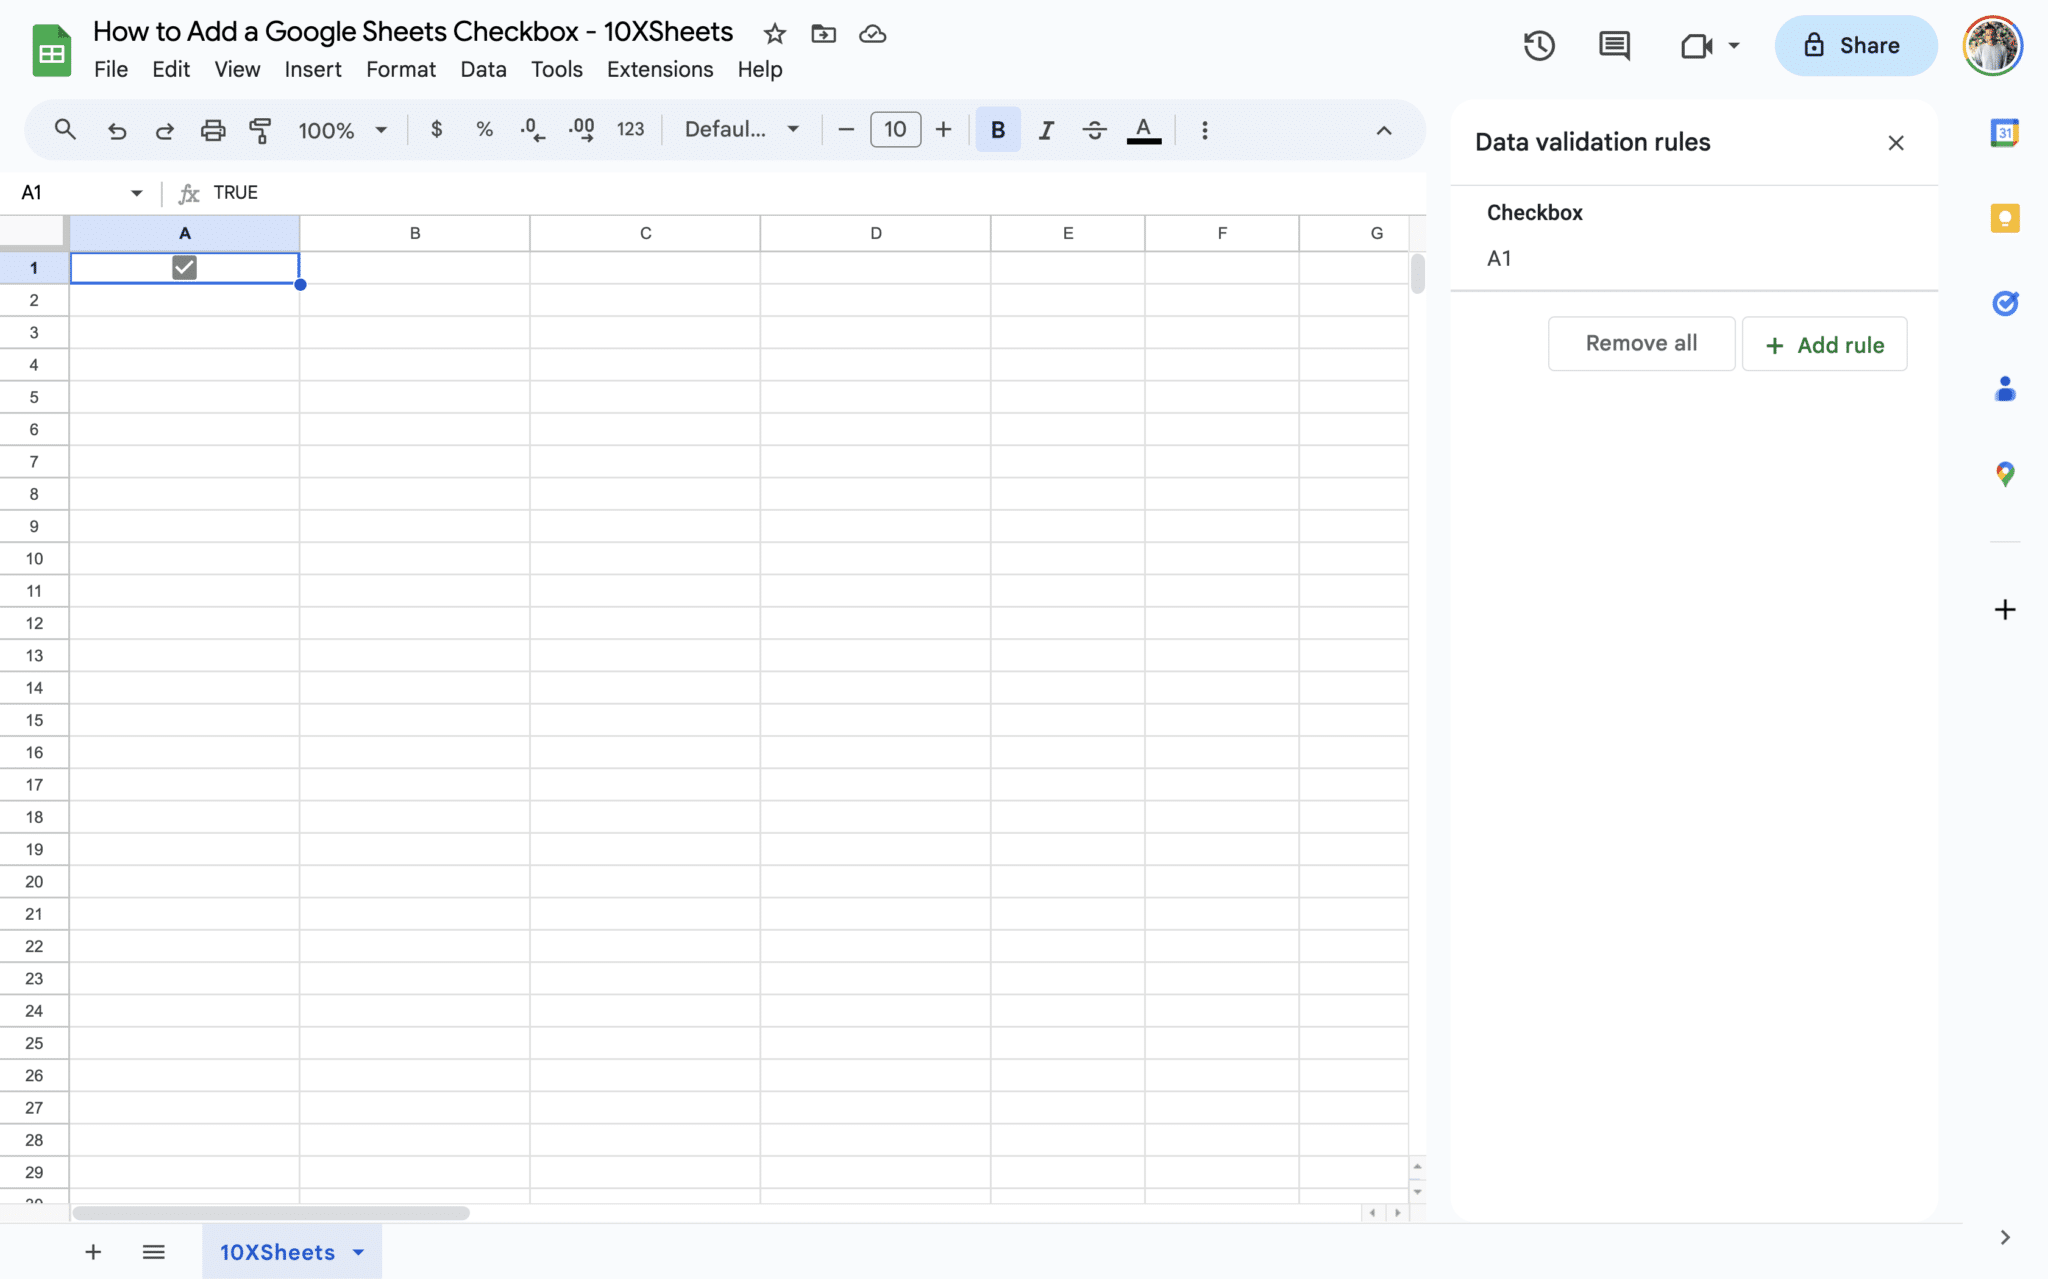
Access Data Validation Options: In the ‘Data Validation’ dialog box, you’ll see various options. The default options include ‘List from a range’ and ‘List of items.’ However, for checkboxes, we need to select ‘Checkbox’ under the ‘Criteria’ section.
Use Custom Cell Values: Check the box that says “Use custom cell values.” This action will allow you to define your preferred values for the checkbox.
Define Custom Values: In the text boxes provided, enter the custom values you want for the checkbox. For example, you can change ‘TRUE’ to ‘YES’ and ‘FALSE’ to ‘NO.’ These custom values will now replace the default values for the selected checkbox.
Now that you’ve customized the checkbox values, they will align better with your specific tasks or data requirements.
Managing and Using Google Sheets Checkbox Data
We’ll explore how to effectively manage and utilize checkbox data in your Google Sheets. Checkboxes offer great versatility, and mastering their usage can significantly improve your spreadsheet workflows.
Selecting and Checking/Unchecking Checkboxes
The fundamental interaction with checkboxes involves selecting and toggling their state between checked and unchecked. Here’s a quick recap:
Selection: Simply click on a checkbox to select it.
Checking and Unchecking: Clicking on a checkbox will toggle its value between ‘TRUE’ (checked) and ‘FALSE’ (unchecked).
Linking Checkboxes
Linking checkboxes enables you to establish dependencies between them. This functionality can be valuable when managing tasks, options, or selections.
For example, suppose you have a list of options, and you want to allow users to select only one at a time. You can link these checkboxes so that checking one option automatically unchecks the others. This ensures data consistency and user-friendly interactions.
Working with Checkbox Data in Formulas
Checkbox values can be integrated into various Google Sheets formulas to perform calculations and derive meaningful insights from your data.
Example: How to Count Checkboxes in Google Sheets?
Let’s say you have a task list with checkboxes, and you want to count the number of completed tasks. You can achieve this using the COUNTIF function:
=COUNTIF(C2:C11, TRUE)
In this formula:
C2:C11 represents the range of cells containing checkboxes.
TRUE is the criterion. The formula counts the number of cells in the range with a value of ‘TRUE,’ indicating completed tasks.
This simple formula helps you keep track of completed tasks in your list.
How to Apply Conditional Formatting to Checkboxes in Google Sheets?
Conditional formatting allows you to visually enhance checkboxes based on specific conditions. It’s a powerful tool for making your spreadsheet more informative and visually appealing.
Example: Strikethrough for Completed Tasks
Imagine you have a to-do list in Google Sheets, and you want completed tasks to have a strikethrough. You can achieve this using conditional formatting:
Select the Cells: Choose the cells containing the checkboxes of the tasks you want to format.
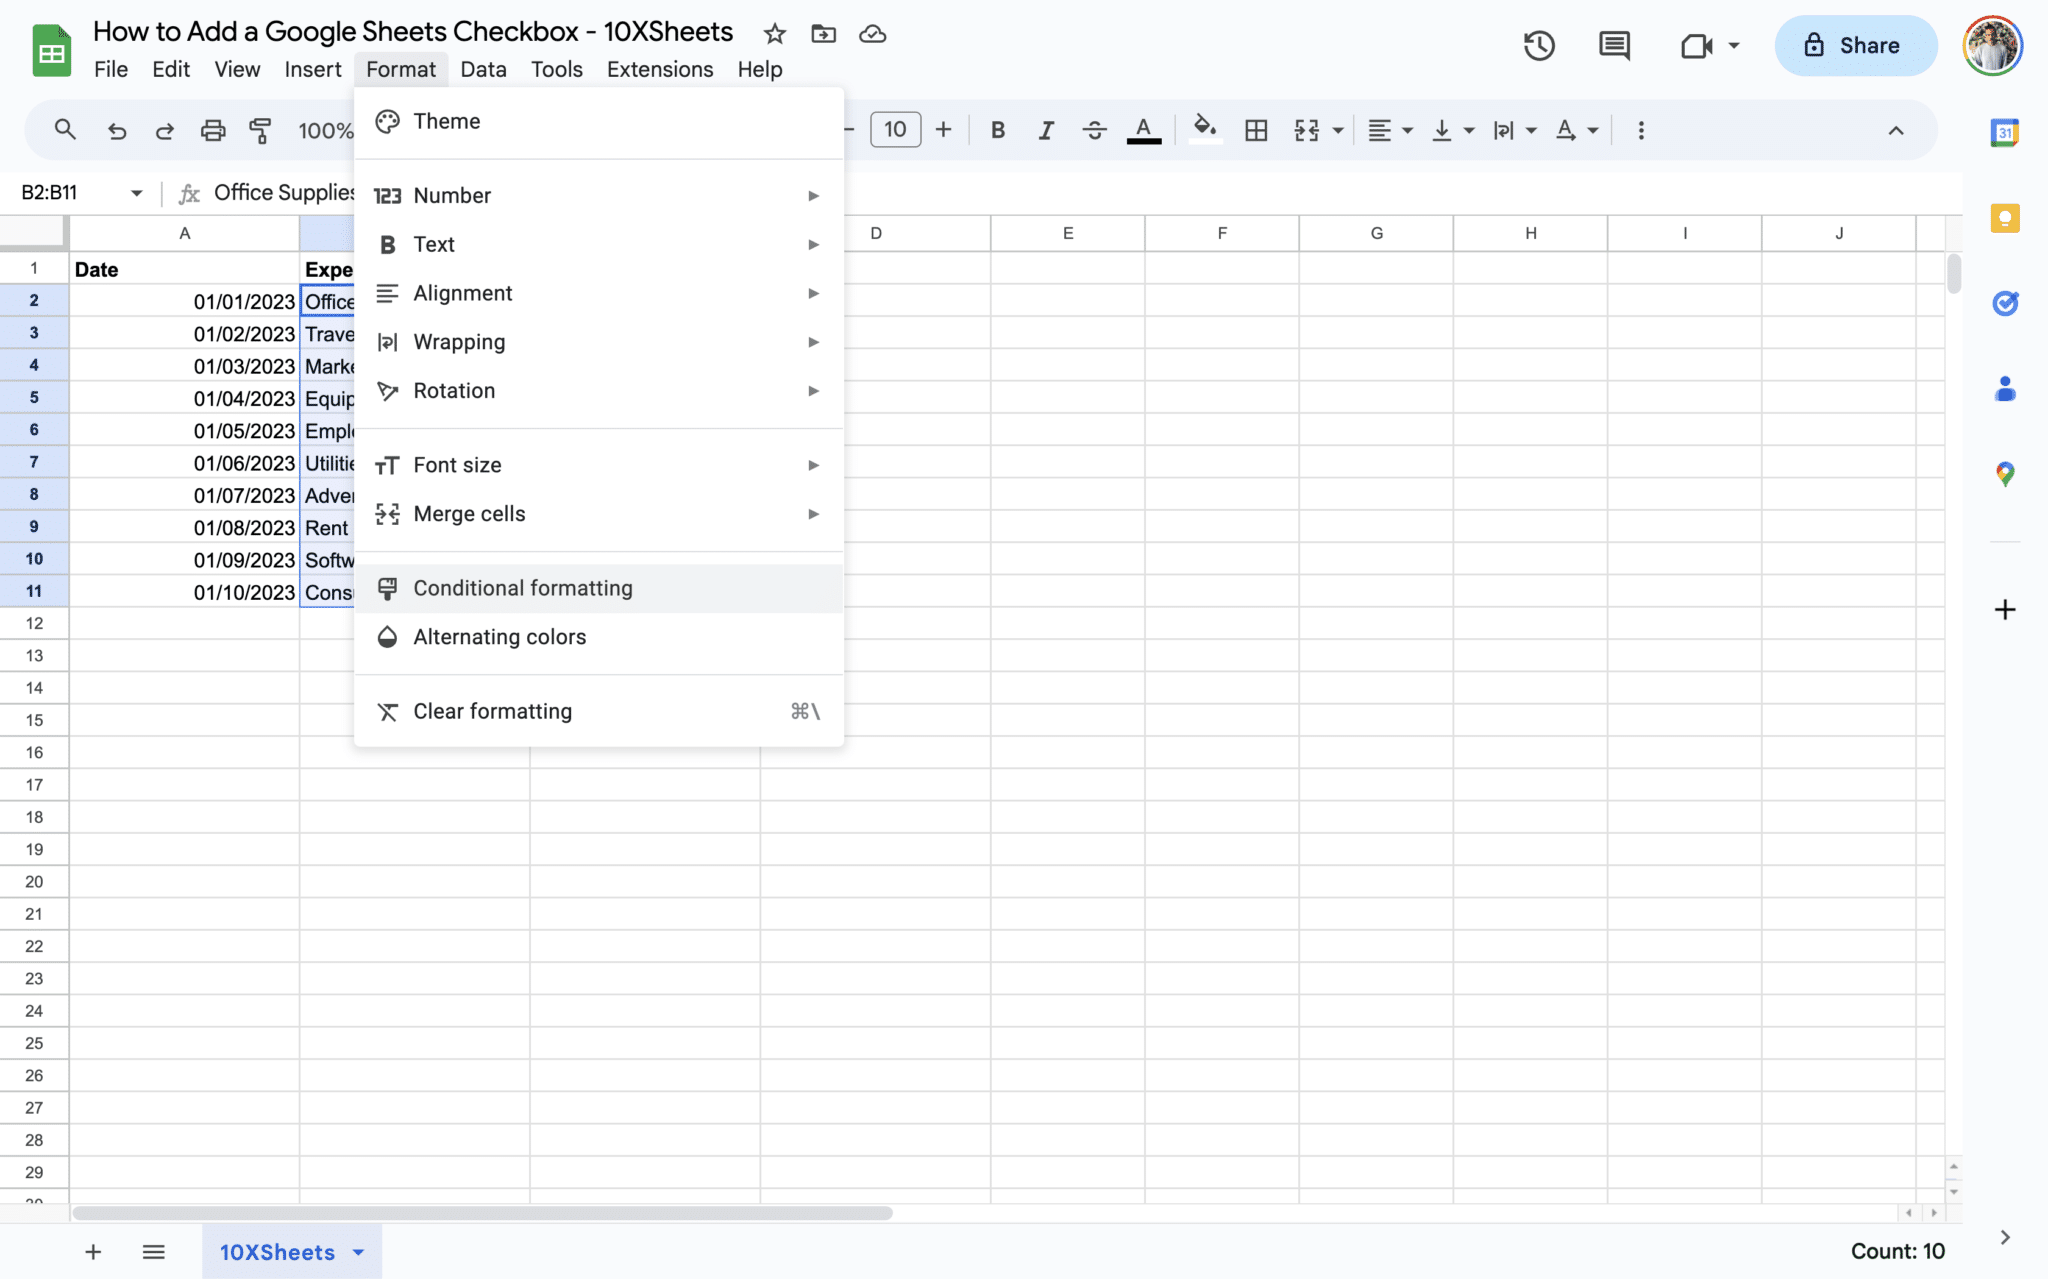
Access Conditional Formatting: Navigate to Format > Conditional formatting from the top menu.
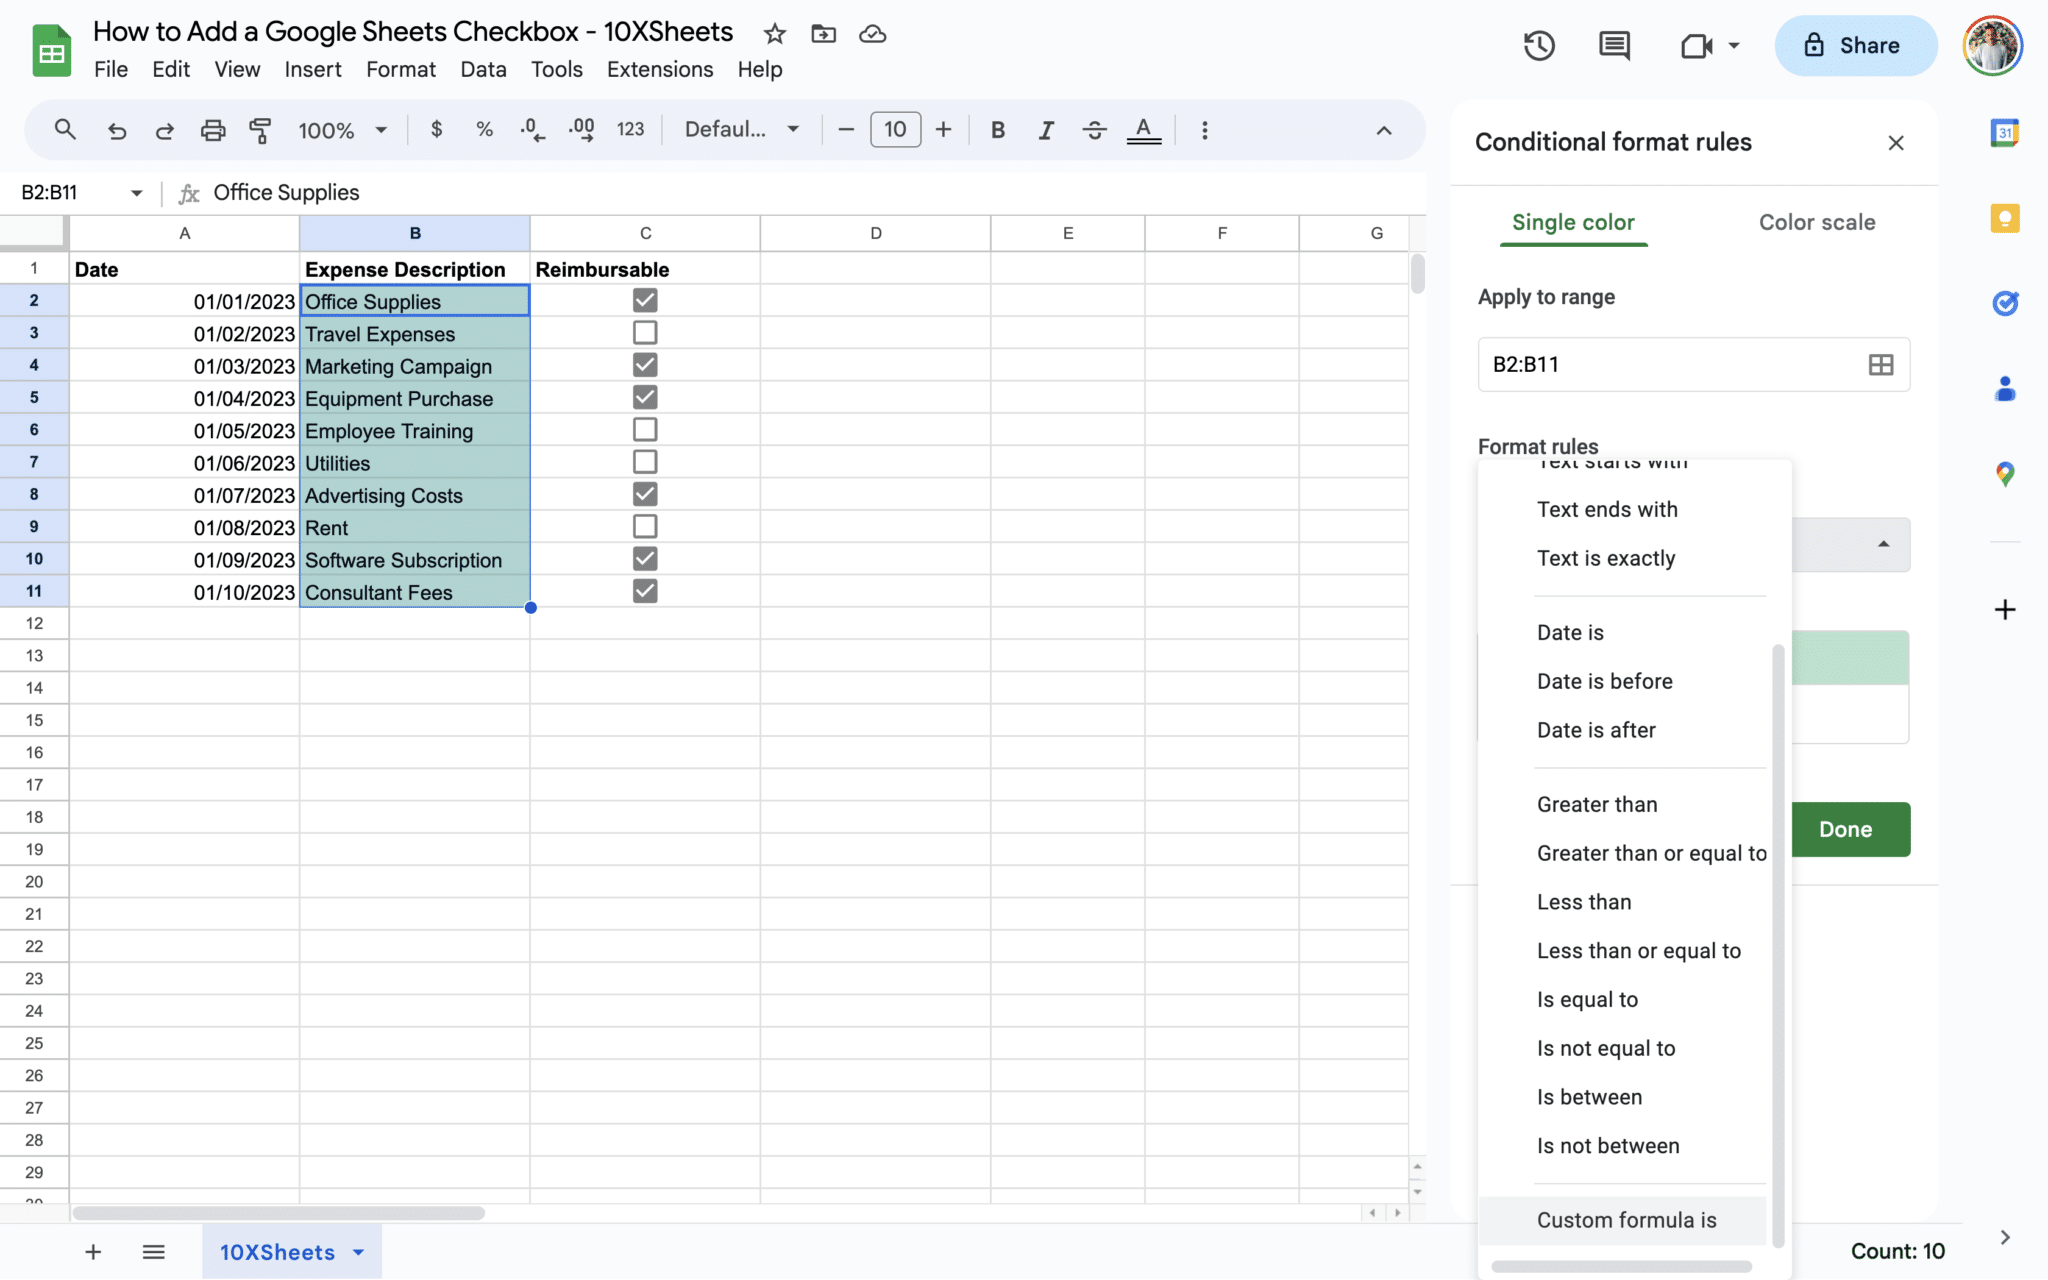
Define Custom Condition: In the ‘Conditional format rules’ sidebar, select “Custom formula is.”
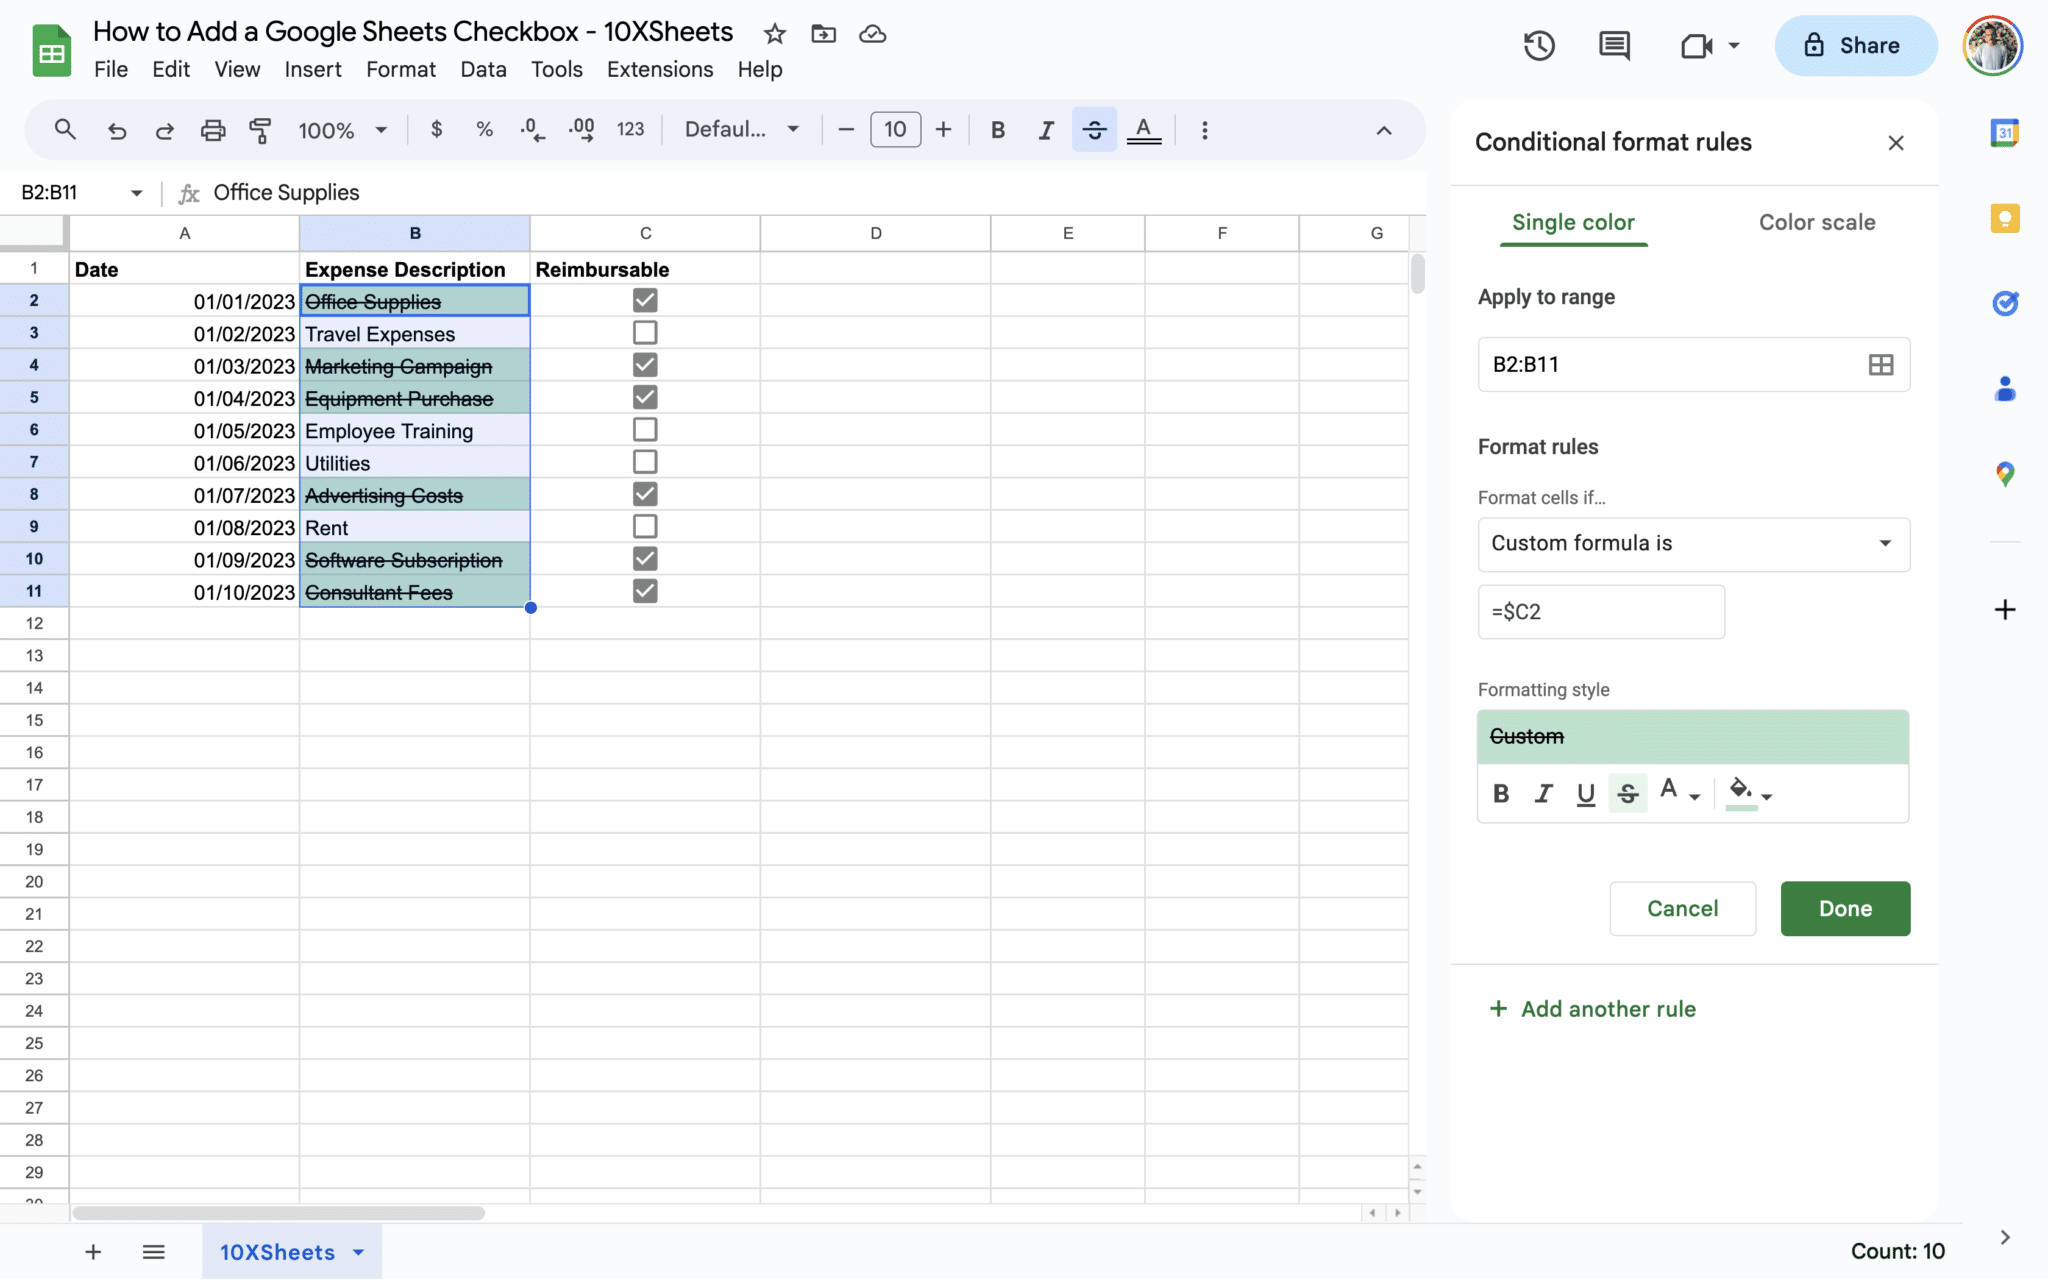
Specify the Formula: For this example, use the formula =$C2, where $C2 is the cell reference containing the checkbox status you want to base the condition on.
Choose Formatting Style: Select the desired formatting style for completed tasks. You can apply strikethrough, change text color, or highlight the cell.
Once set up, as you check the tasks’ checkboxes, the chosen format will be automatically applied, making it easy to identify completed items in your to-do list.
How to Combine Checkboxes with Other Google Sheets Tools?
Combining checkboxes with other Google Sheets tools and functions can supercharge your spreadsheet capabilities. We’ll explore how checkboxes can work seamlessly with various features to enhance your data management and analysis.
How to Use Checkboxes in Conjunction with Other Google Sheets Functions?
Checkboxes can be integrated with various Google Sheets functions to automate processes and gain valuable insights from your data. Let’s explore an example of using checkboxes with the SUMIF function to calculate sums based on checkbox values.
Example: Calculating the Sum of Checked Items
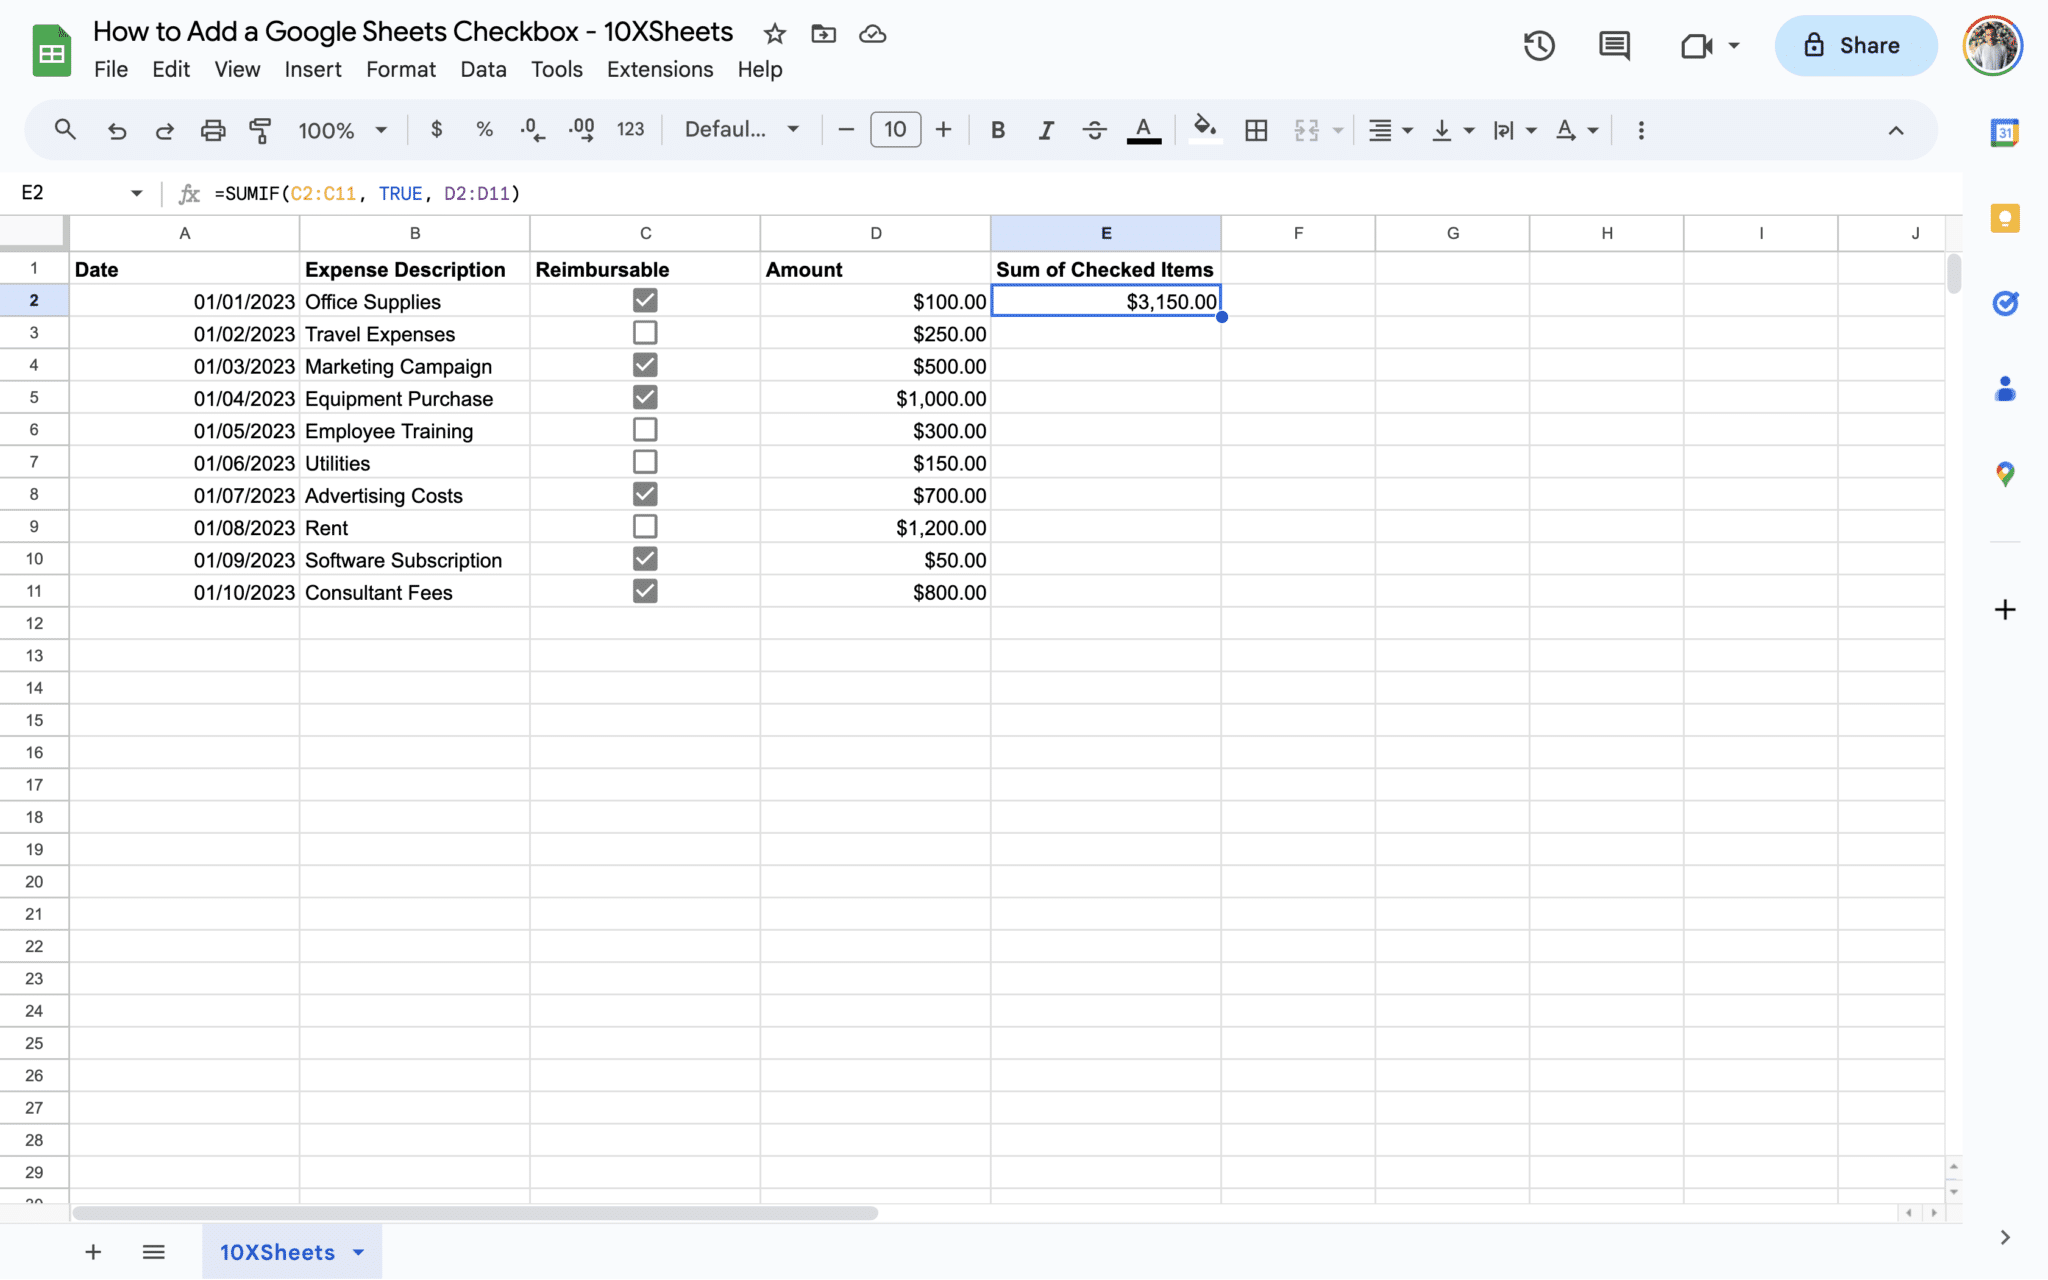
Suppose you have a list of expenses with checkboxes to mark them as reimbursable or non-reimbursable. You can calculate the total reimbursable amount using the SUMIF function:
Create a Checkbox Column: Ensure you have a column with checkboxes to mark expenses as reimbursable.
Calculate with SUMIF: In an empty cell, type the following formula:
=SUMIF(C2:C11, TRUE, D2:D11)
C2:C11 represents the range of cells containing the checkboxes.
TRUE is the criterion, indicating that we want to sum values where the checkbox is checked (‘TRUE’).
D2:D11 represents the range containing the expense amounts.
This formula calculates the total amount of reimbursable expenses, providing you with a clear financial overview.
Copying and Managing Multiple Google Sheets Checkboxes
When working with spreadsheets that involve multiple checkboxes, efficient management becomes crucial. We’ll explore techniques for copying, adding, grouping, and renaming checkboxes.
How to Copy Checkboxes in Google Sheets?
Copying cells containing checkboxes is a common task and can be done using various methods:
Edit Menu: You can copy checkboxes through the ‘Edit’ menu by selecting the cells, right-clicking, and choosing ‘Copy,’ or by using the keyboard shortcuts Ctrl + C (Windows) or Cmd + C (Mac).
Drag and Drop: Another way to copy checkboxes is by using the fill handle. Click and drag the fill handle (a small square at the bottom-right corner of the selected cell) to copy the checkboxes to adjacent cells.
Copying checkboxes allows you to replicate checkboxes in different parts of your spreadsheet, saving you time and effort.
Bulk Addition of Checkboxes
If you need to add checkboxes to multiple cells at once, you can use the ‘Data > Checkbox’ option. This method simplifies the process of adding checkboxes in bulk, especially when dealing with large datasets.
Managing and organizing checkboxes effectively ensures that your spreadsheet remains clear, structured, and easy to work with, especially when dealing with complex datasets.
Advanced Google Sheets Checkbox Techniques
Now, let’s go through some advanced techniques to leverage the full potential of checkboxes in Google Sheets. These techniques involve automation and integration with external tools, allowing you to streamline your workflows and collect data more efficiently.
How to Use Google Sheets Scripts for Checkbox Automation?
Google Apps Script provides a powerful way to automate tasks and processes in Google Sheets, including advanced automation involving checkboxes. With scripts, you can create custom functions that respond to checkbox actions, making your spreadsheet even more dynamic.
Here are a few examples of what you can achieve with scripts and checkboxes:
Automatically update other cells: You can use scripts to update other cells or perform calculations when checkboxes are checked or unchecked.
Send email notifications: Set up scripts to send email notifications when specific checkboxes are checked, making it easy to alert team members or stakeholders about important updates.
Generate reports: Automate the generation of reports or summaries based on checkbox selections, saving you time and ensuring data accuracy.
To get started with Google Apps Script, you can access it from the ‘Extensions’ menu in Google Sheets. You may need some coding knowledge or explore available scripts in the Google Workspace Marketplace to achieve your specific automation goals.
How to Integrate Checkboxes with Google Forms?
Google Forms is a powerful tool for collecting data, and you can integrate checkboxes seamlessly into your forms. By including checkboxes as response options, you allow respondents to select multiple choices easily. Here’s how to integrate checkboxes with Google Forms:
Create a New Form: Start by creating a new form in Google Forms or open an existing one.
Add a Multiple-Choice Question: To include checkboxes, add a multiple-choice question to your form.
Define Response Options: In the question settings, provide response options that correspond to the checkboxes you want to include. These options will appear as checkboxes for respondents to select.
Save and Share: Once your form is ready, save it and share it with your intended audience. Respondents can now use checkboxes to select their choices when filling out the form.
By integrating checkboxes with Google Forms, you can collect structured data, conduct surveys, or gather feedback more effectively.
Best Practices for Effective Checkbox Usage
To make the most of checkboxes in Google Sheets and maintain a well-organized spreadsheet, implement the following best practices:
Consistent Naming Conventions: Use consistent and descriptive names for your checkboxes. This makes it easier to understand their purpose and function within the spreadsheet.
Group Related Checkboxes: If your spreadsheet contains multiple checkboxes with similar functions or related tasks, group them together. Grouping helps you maintain order and allows for easy management of related checkboxes.
Data Validation: Implement data validation rules to ensure that checkboxes are used correctly. For example, if a checkbox represents a binary choice, set up validation to allow only ‘TRUE’ or ‘FALSE’ values.
Clear Documentation: Add comments or notes to your checkboxes if necessary. Documentation can be helpful, especially when sharing the spreadsheet with collaborators who may not be familiar with your setup.
Regular Review: Periodically review and update checkboxes as needed. Over time, data requirements may change, and it’s essential to ensure that checkboxes remain aligned with your goals.
Collaboration Awareness: When collaborating on a spreadsheet with others, communicate about the use and meaning of checkboxes to avoid confusion and ensure everyone is on the same page.
Troubleshooting Common Checkbox Issues
Even with the best practices in place, you may encounter common issues related to checkboxes in Google Sheets. Let’s explore some troubleshooting tips for resolving these issues.
Checkbox Alignment Problems
If checkboxes appear misaligned or don’t align as expected within cells, you can adjust their positioning using the alignment options in the toolbar. Experiment with horizontal and vertical alignment settings to achieve the desired placement.
Checkbox Responsiveness
If checkboxes don’t respond as expected when clicked, check for any formula errors or script issues linked to the checkboxes. Review the cell references and formulas to identify and correct the problem.
Checkbox Overlapping Issues
To prevent checkboxes from overlapping, ensure that there is enough spacing between them in your spreadsheet layout. Adjust cell sizes and spacing as needed to avoid overlap, making checkboxes easier to work with and less prone to accidental clicks.
By following these troubleshooting tips and best practices, you can address and prevent common checkbox-related issues, ensuring a smooth and error-free experience when working with checkboxes in Google Sheets.
Conclusion
Checkboxes in Google Sheets are a powerful tool that can transform the way you manage data and tasks. By following the steps and techniques outlined in this guide, you’ve gained the expertise to insert checkboxes, customize their values, and use them effectively in various scenarios. From task lists to data analysis, checkboxes simplify complex processes and boost productivity.
Remember, checkboxes offer not only simplicity but also organization, collaboration, and automation. By applying the knowledge you’ve acquired here, you can unlock the full potential of checkboxes and take your spreadsheet skills to new heights. So go ahead, start incorporating checkboxes into your Google Sheets, and enjoy the efficiency and clarity they bring to your data-driven projects.
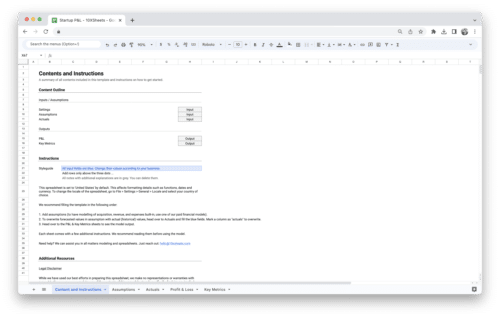
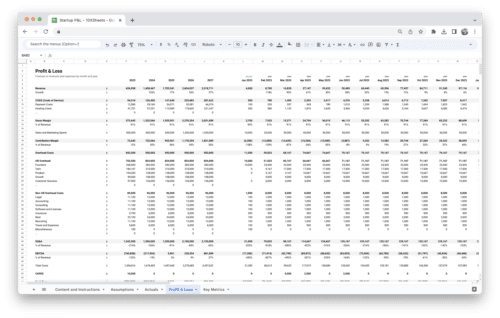
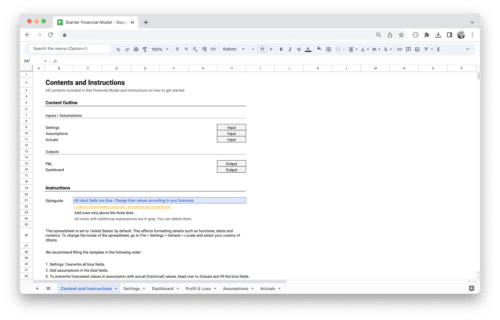
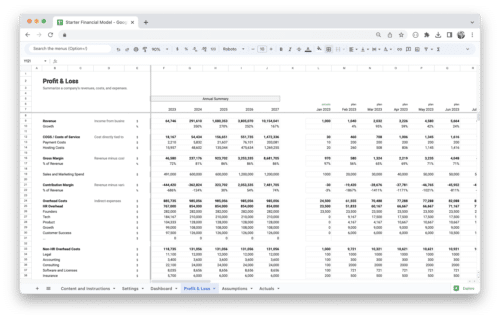
Get Started With a Prebuilt Template!
Looking to streamline your business financial modeling process with a prebuilt customizable template? Say goodbye to the hassle of building a financial model from scratch and get started right away with one of our premium templates.
Save time with no need to create a financial model from scratch.
Reduce errors with prebuilt formulas and calculations.
Customize to your needs by adding/deleting sections and adjusting formulas.
Automatically calculate key metrics for valuable insights.
Make informed decisions about your strategy and goals with a clear picture of your business performance and financial health.